
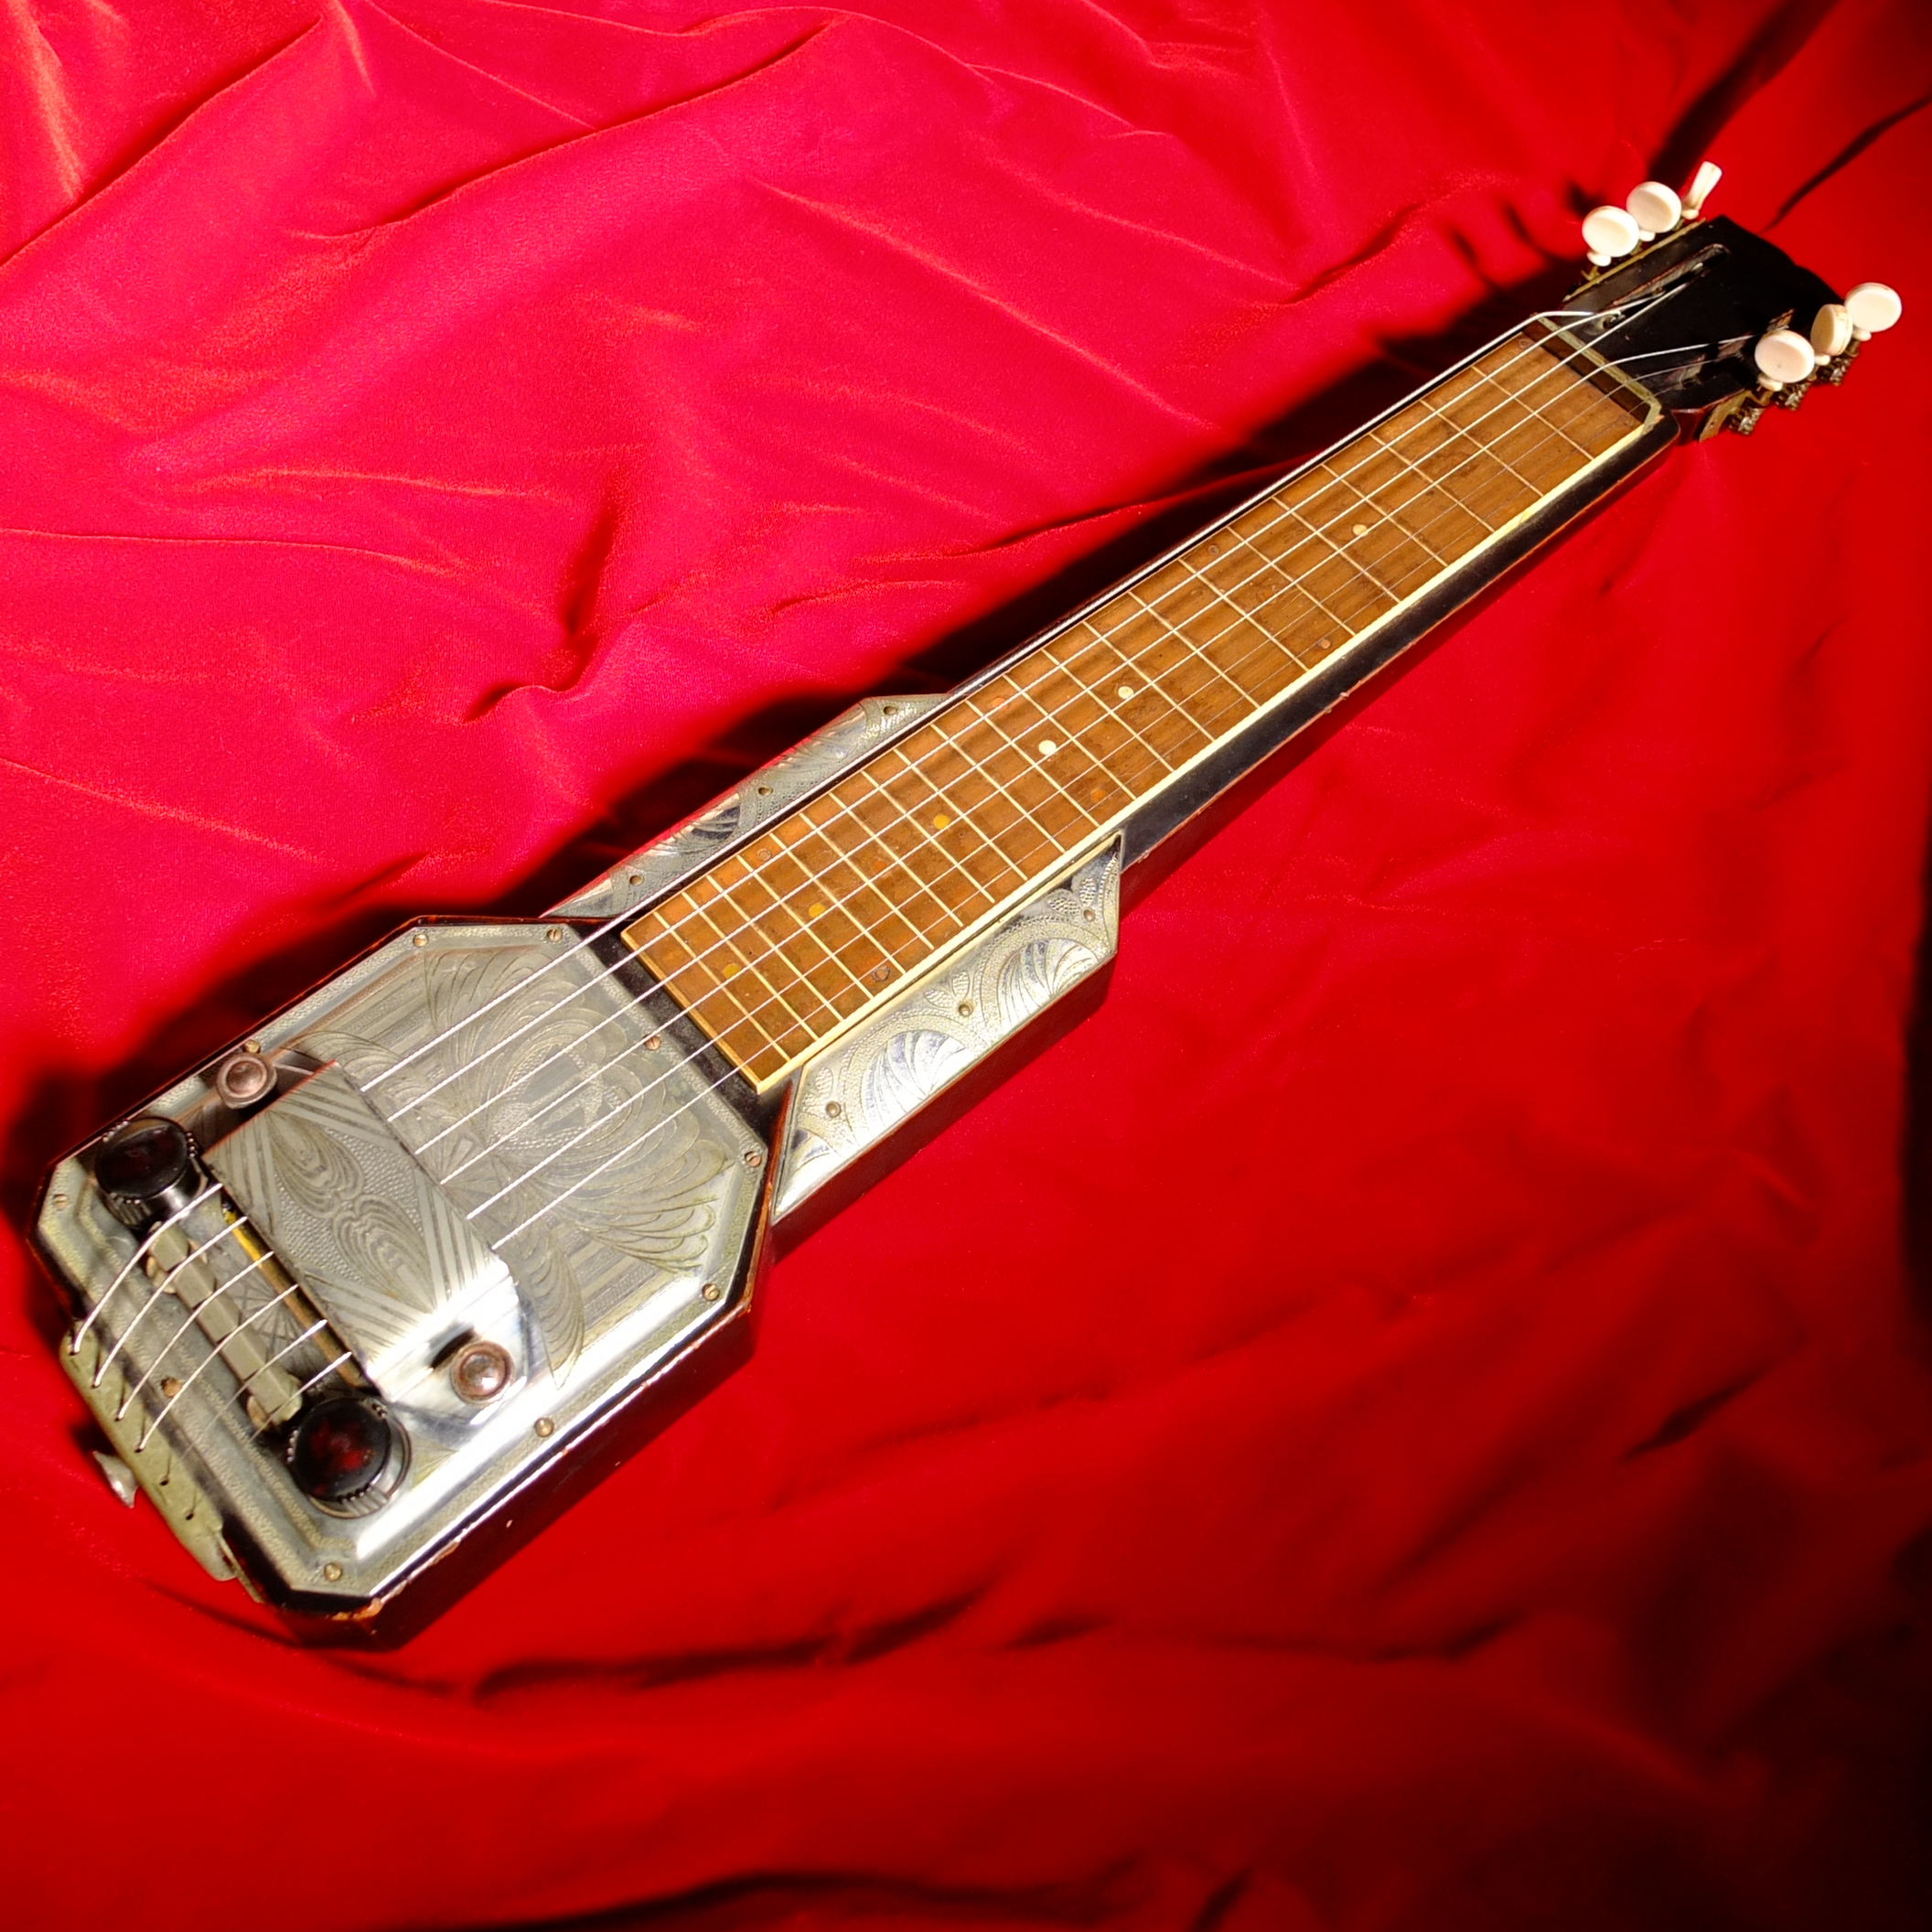
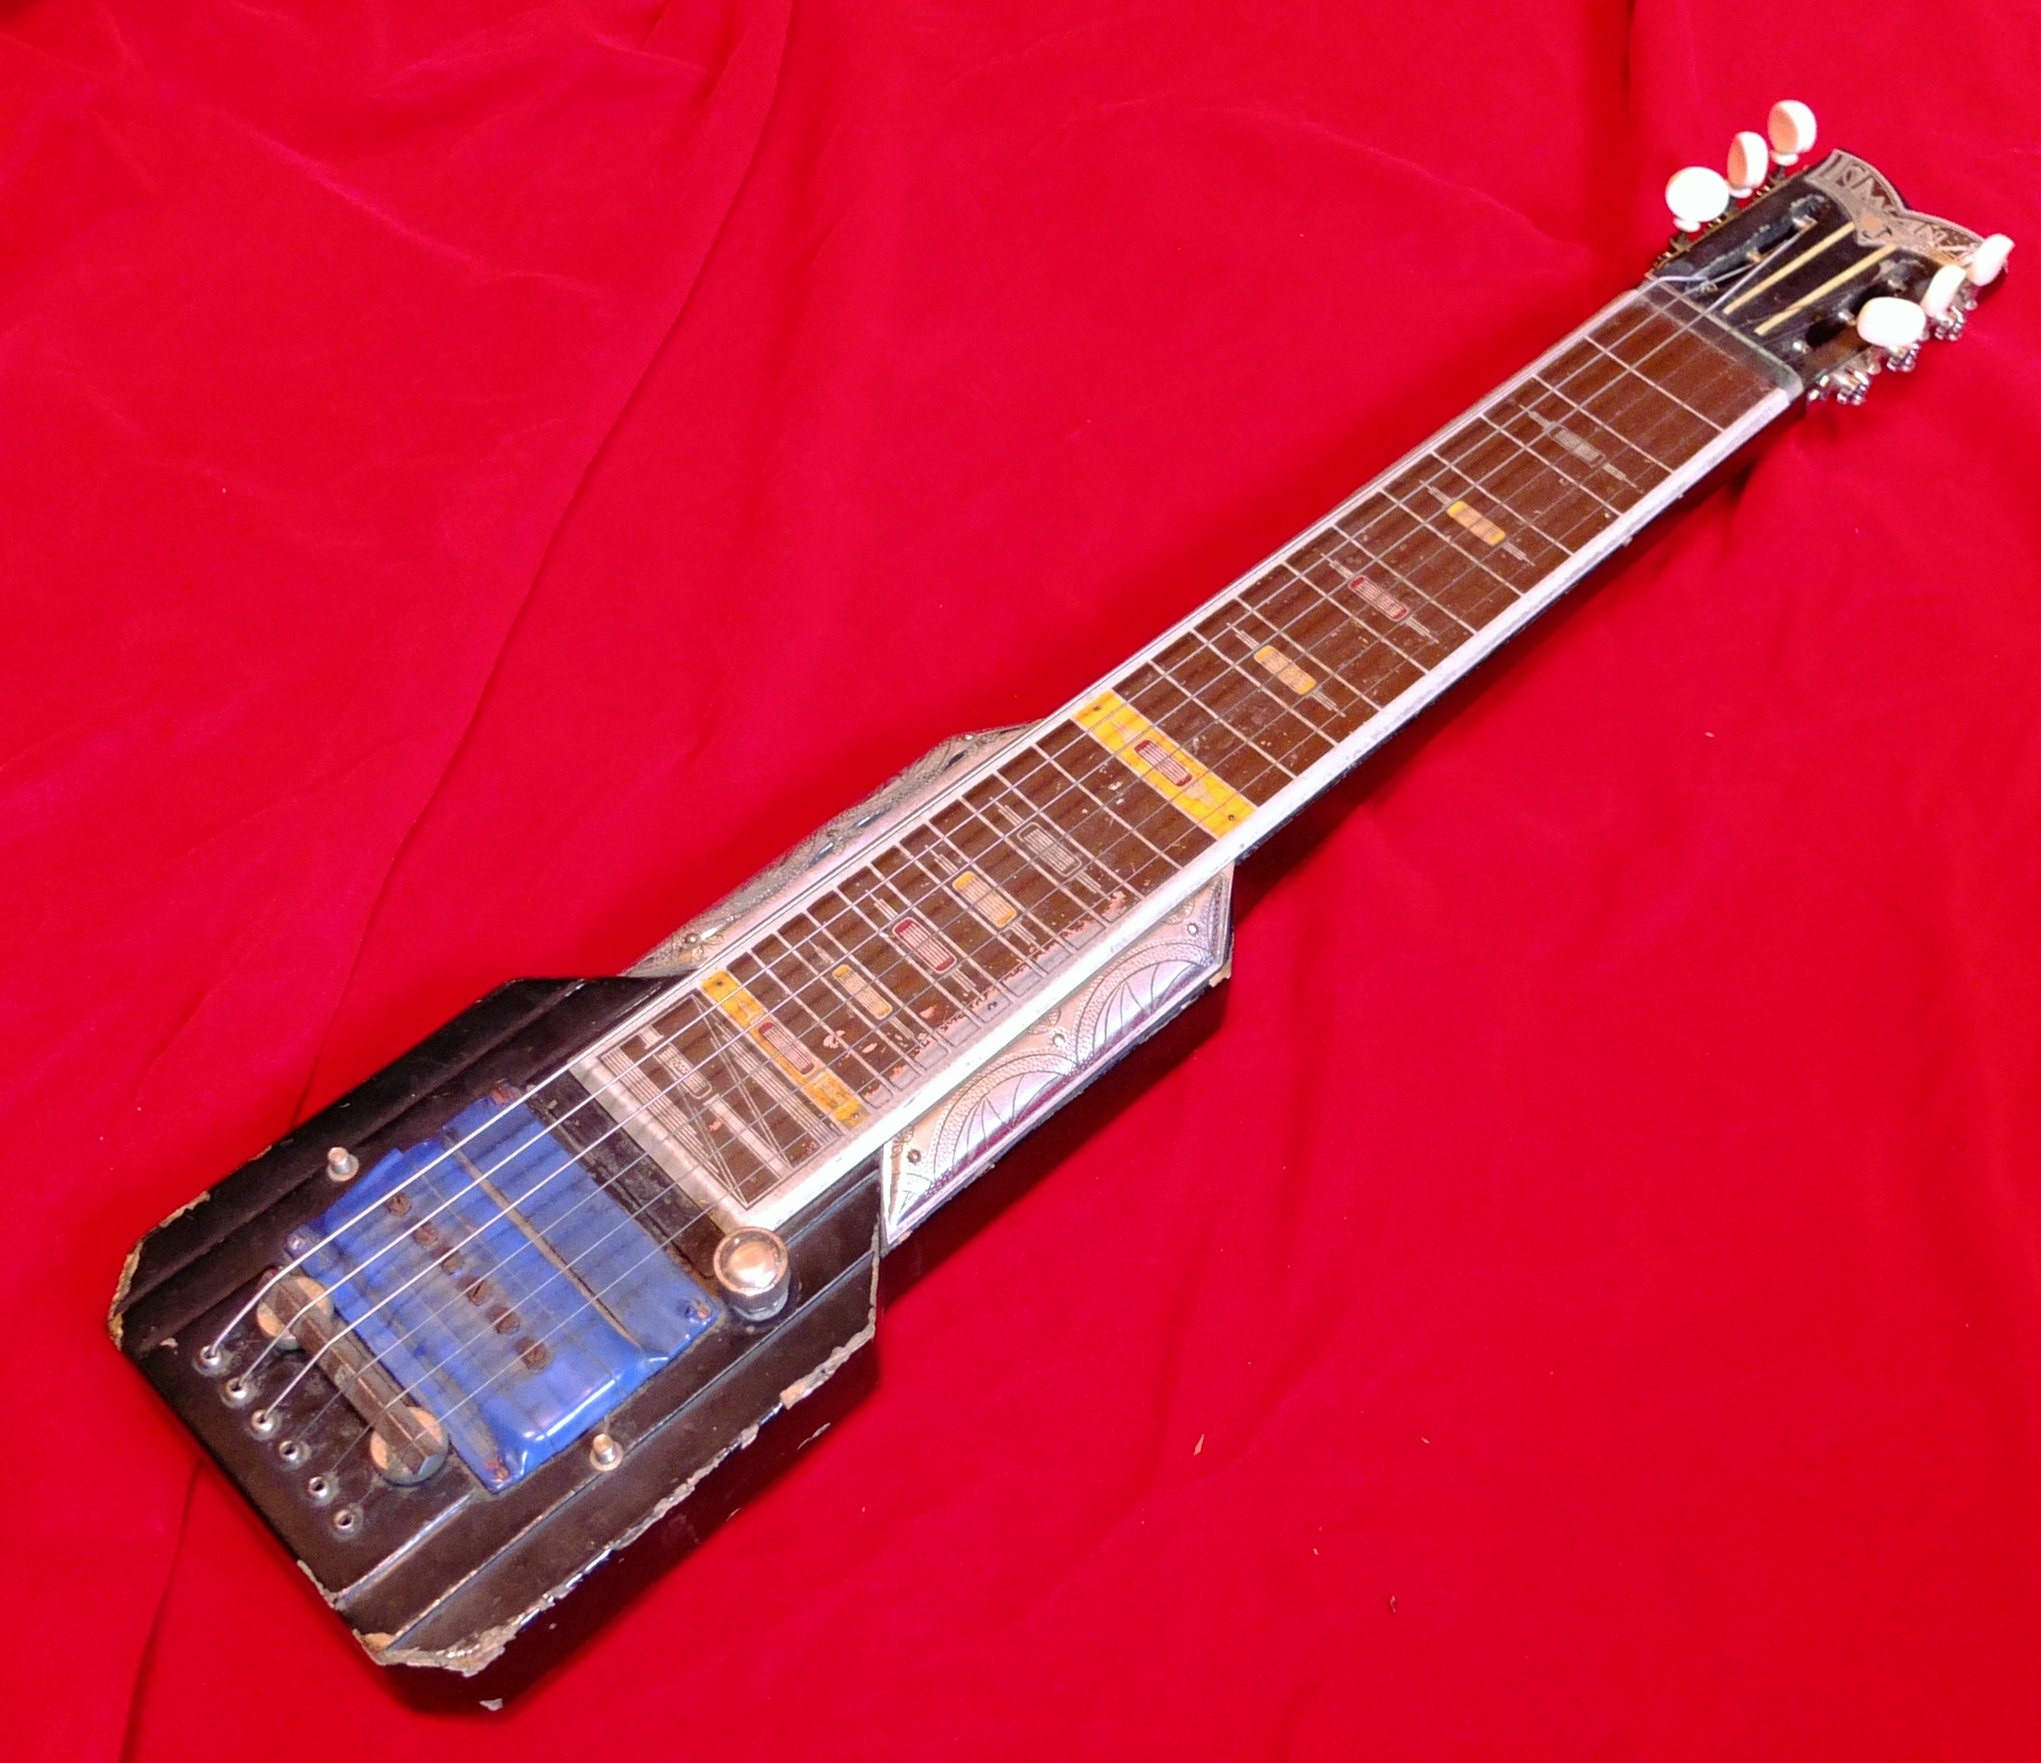
Sometimes when looking for good guitars to fix up and restore here in Japan, I come across a guitar which I have absolutely no idea what it is, but I see the potential in the build of the instrument, and I have a curiosity about the instrument itself, so I take a leap into the unknown. This guitar was one of those instruments:

Already I knew that this was 1950s and possibly earlier based on the bakelite style knobs and all the intricate etching on the metal. It was listed as not having any output and missing a tuner, which can mean a lot of work, but is not insurmountable. I started doing research on 1940’s Lap Steels here in Japan to see if I could find an example of another one of these, but it wasn’t until I got the guitar and could study it in detail that I got my first clue:

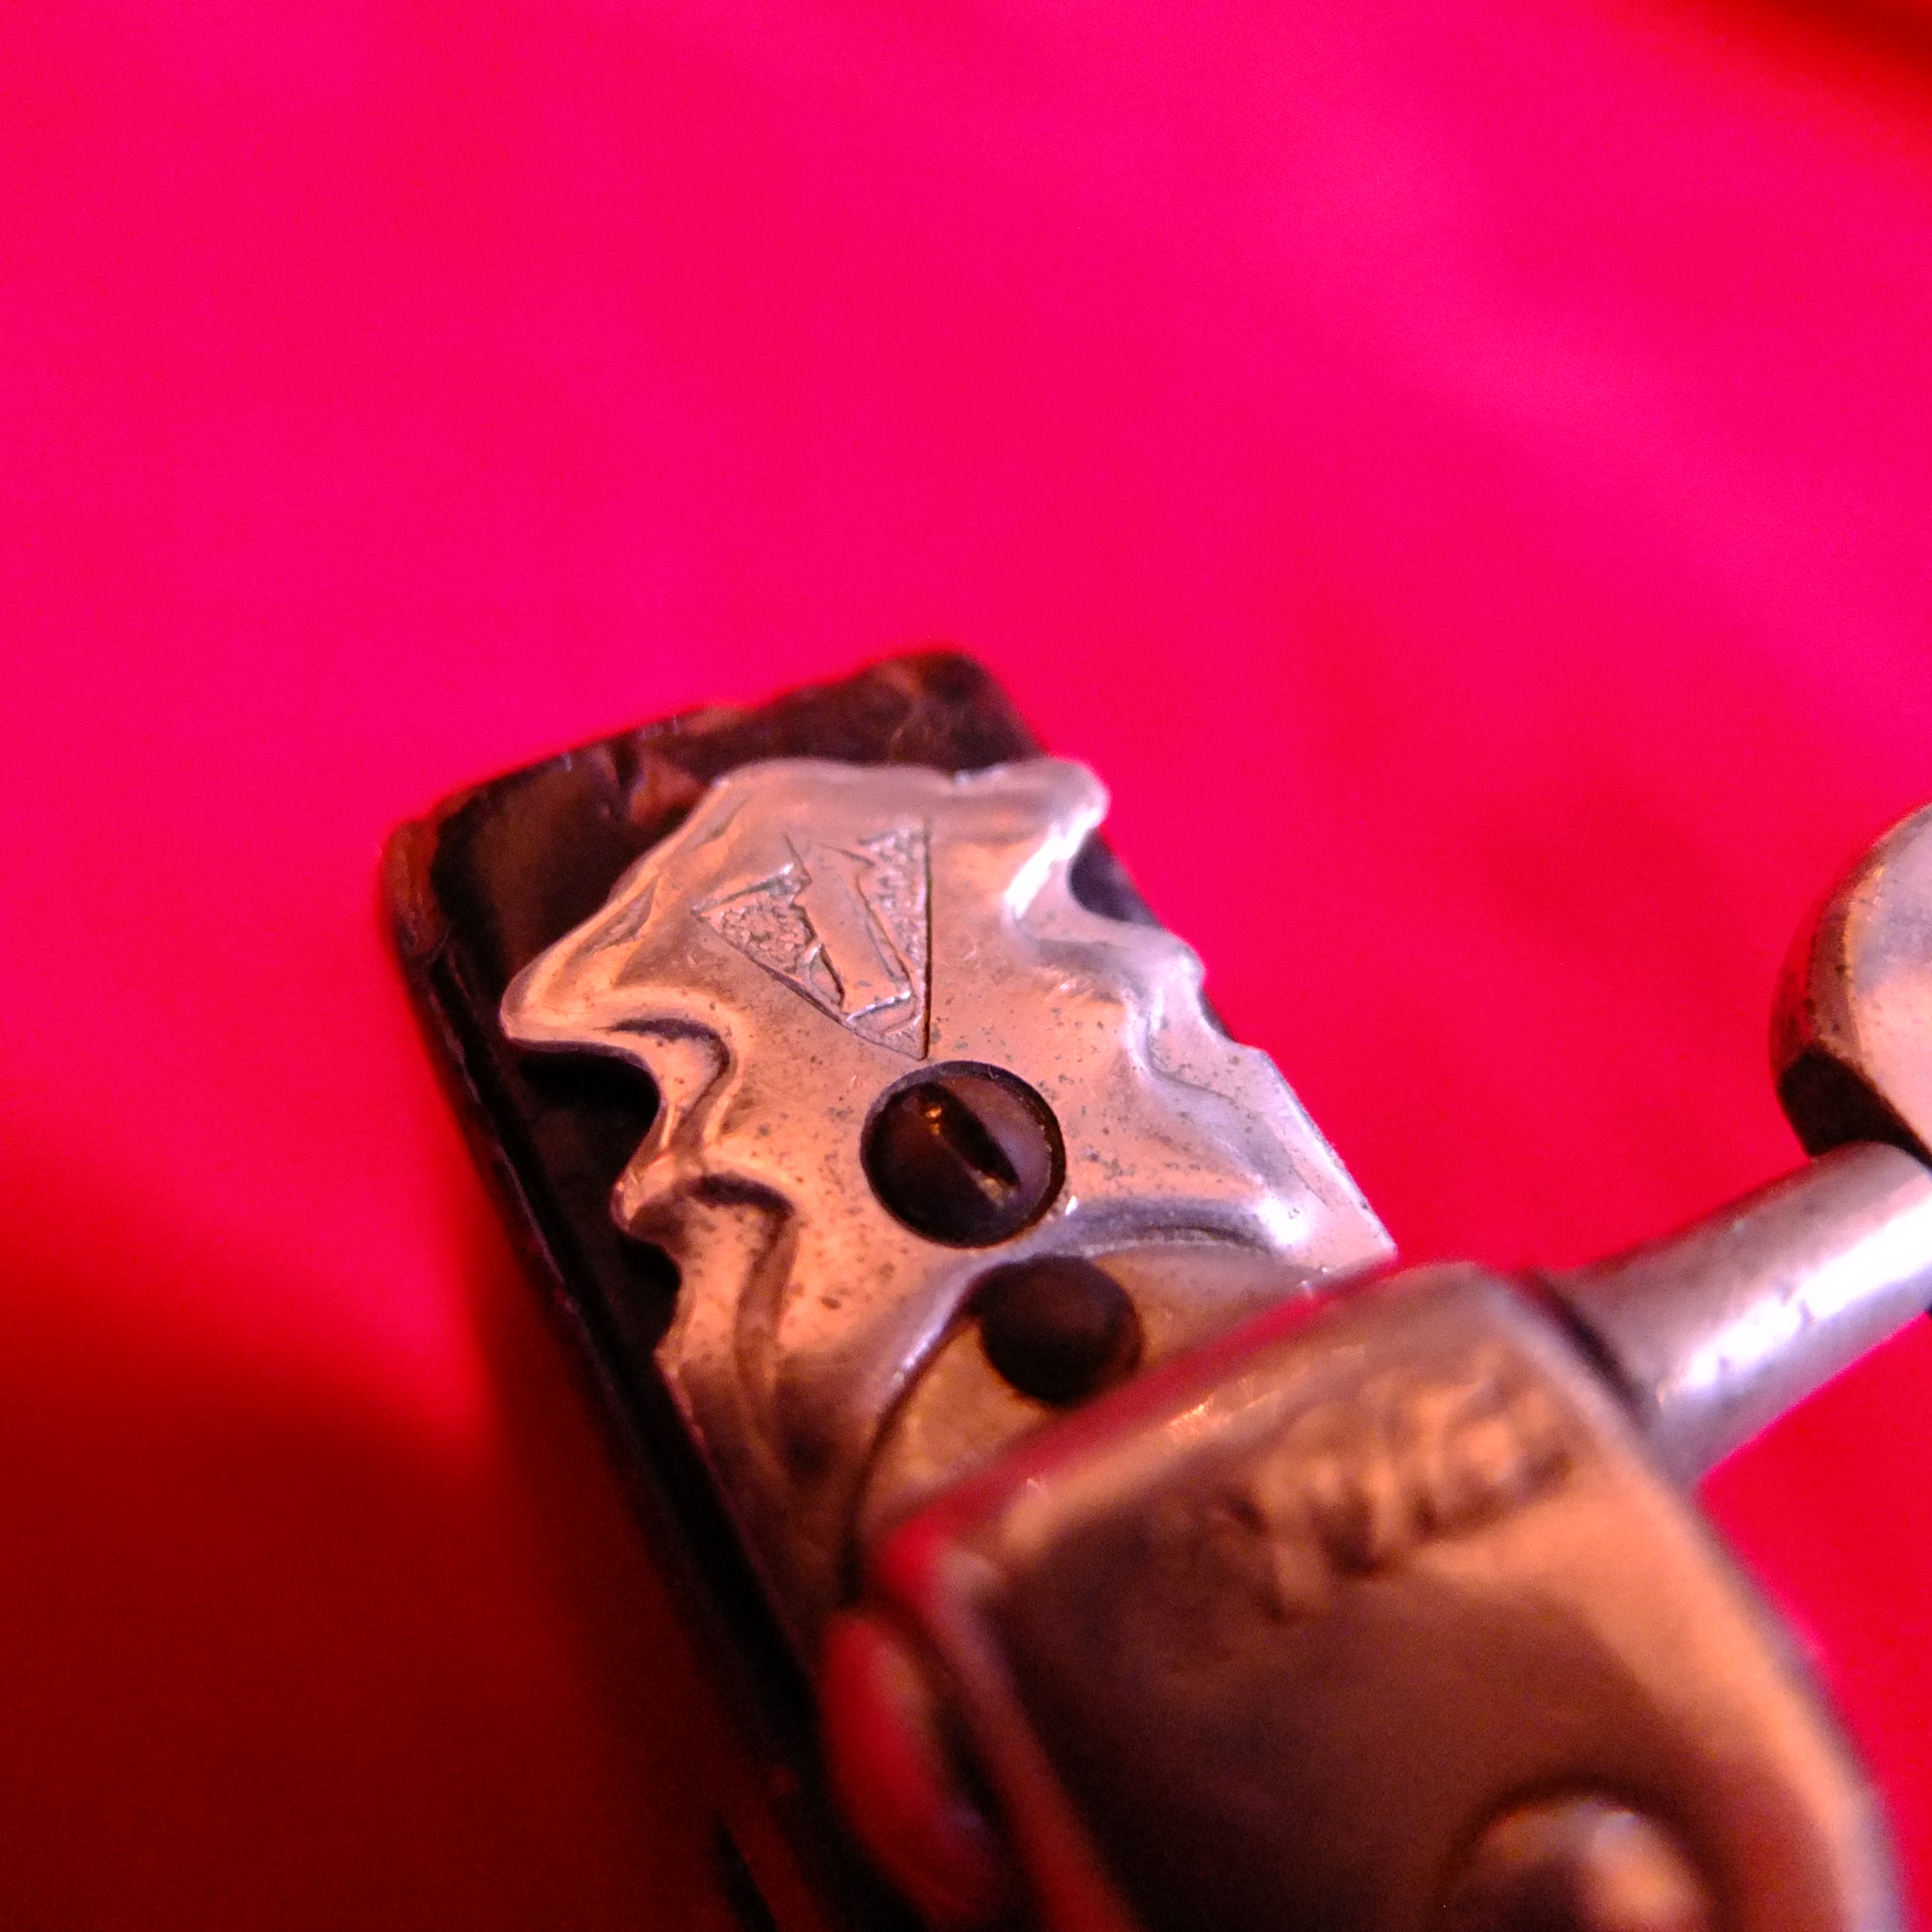
Just in front of the pickup was this emblem of an inverted triangle, a music note, and the number “1”, and while I had been browsing 1940’s Japanese lap steels I had also come across a brand named “Havana” which featured the same emblem, though in a slightly altered variation:

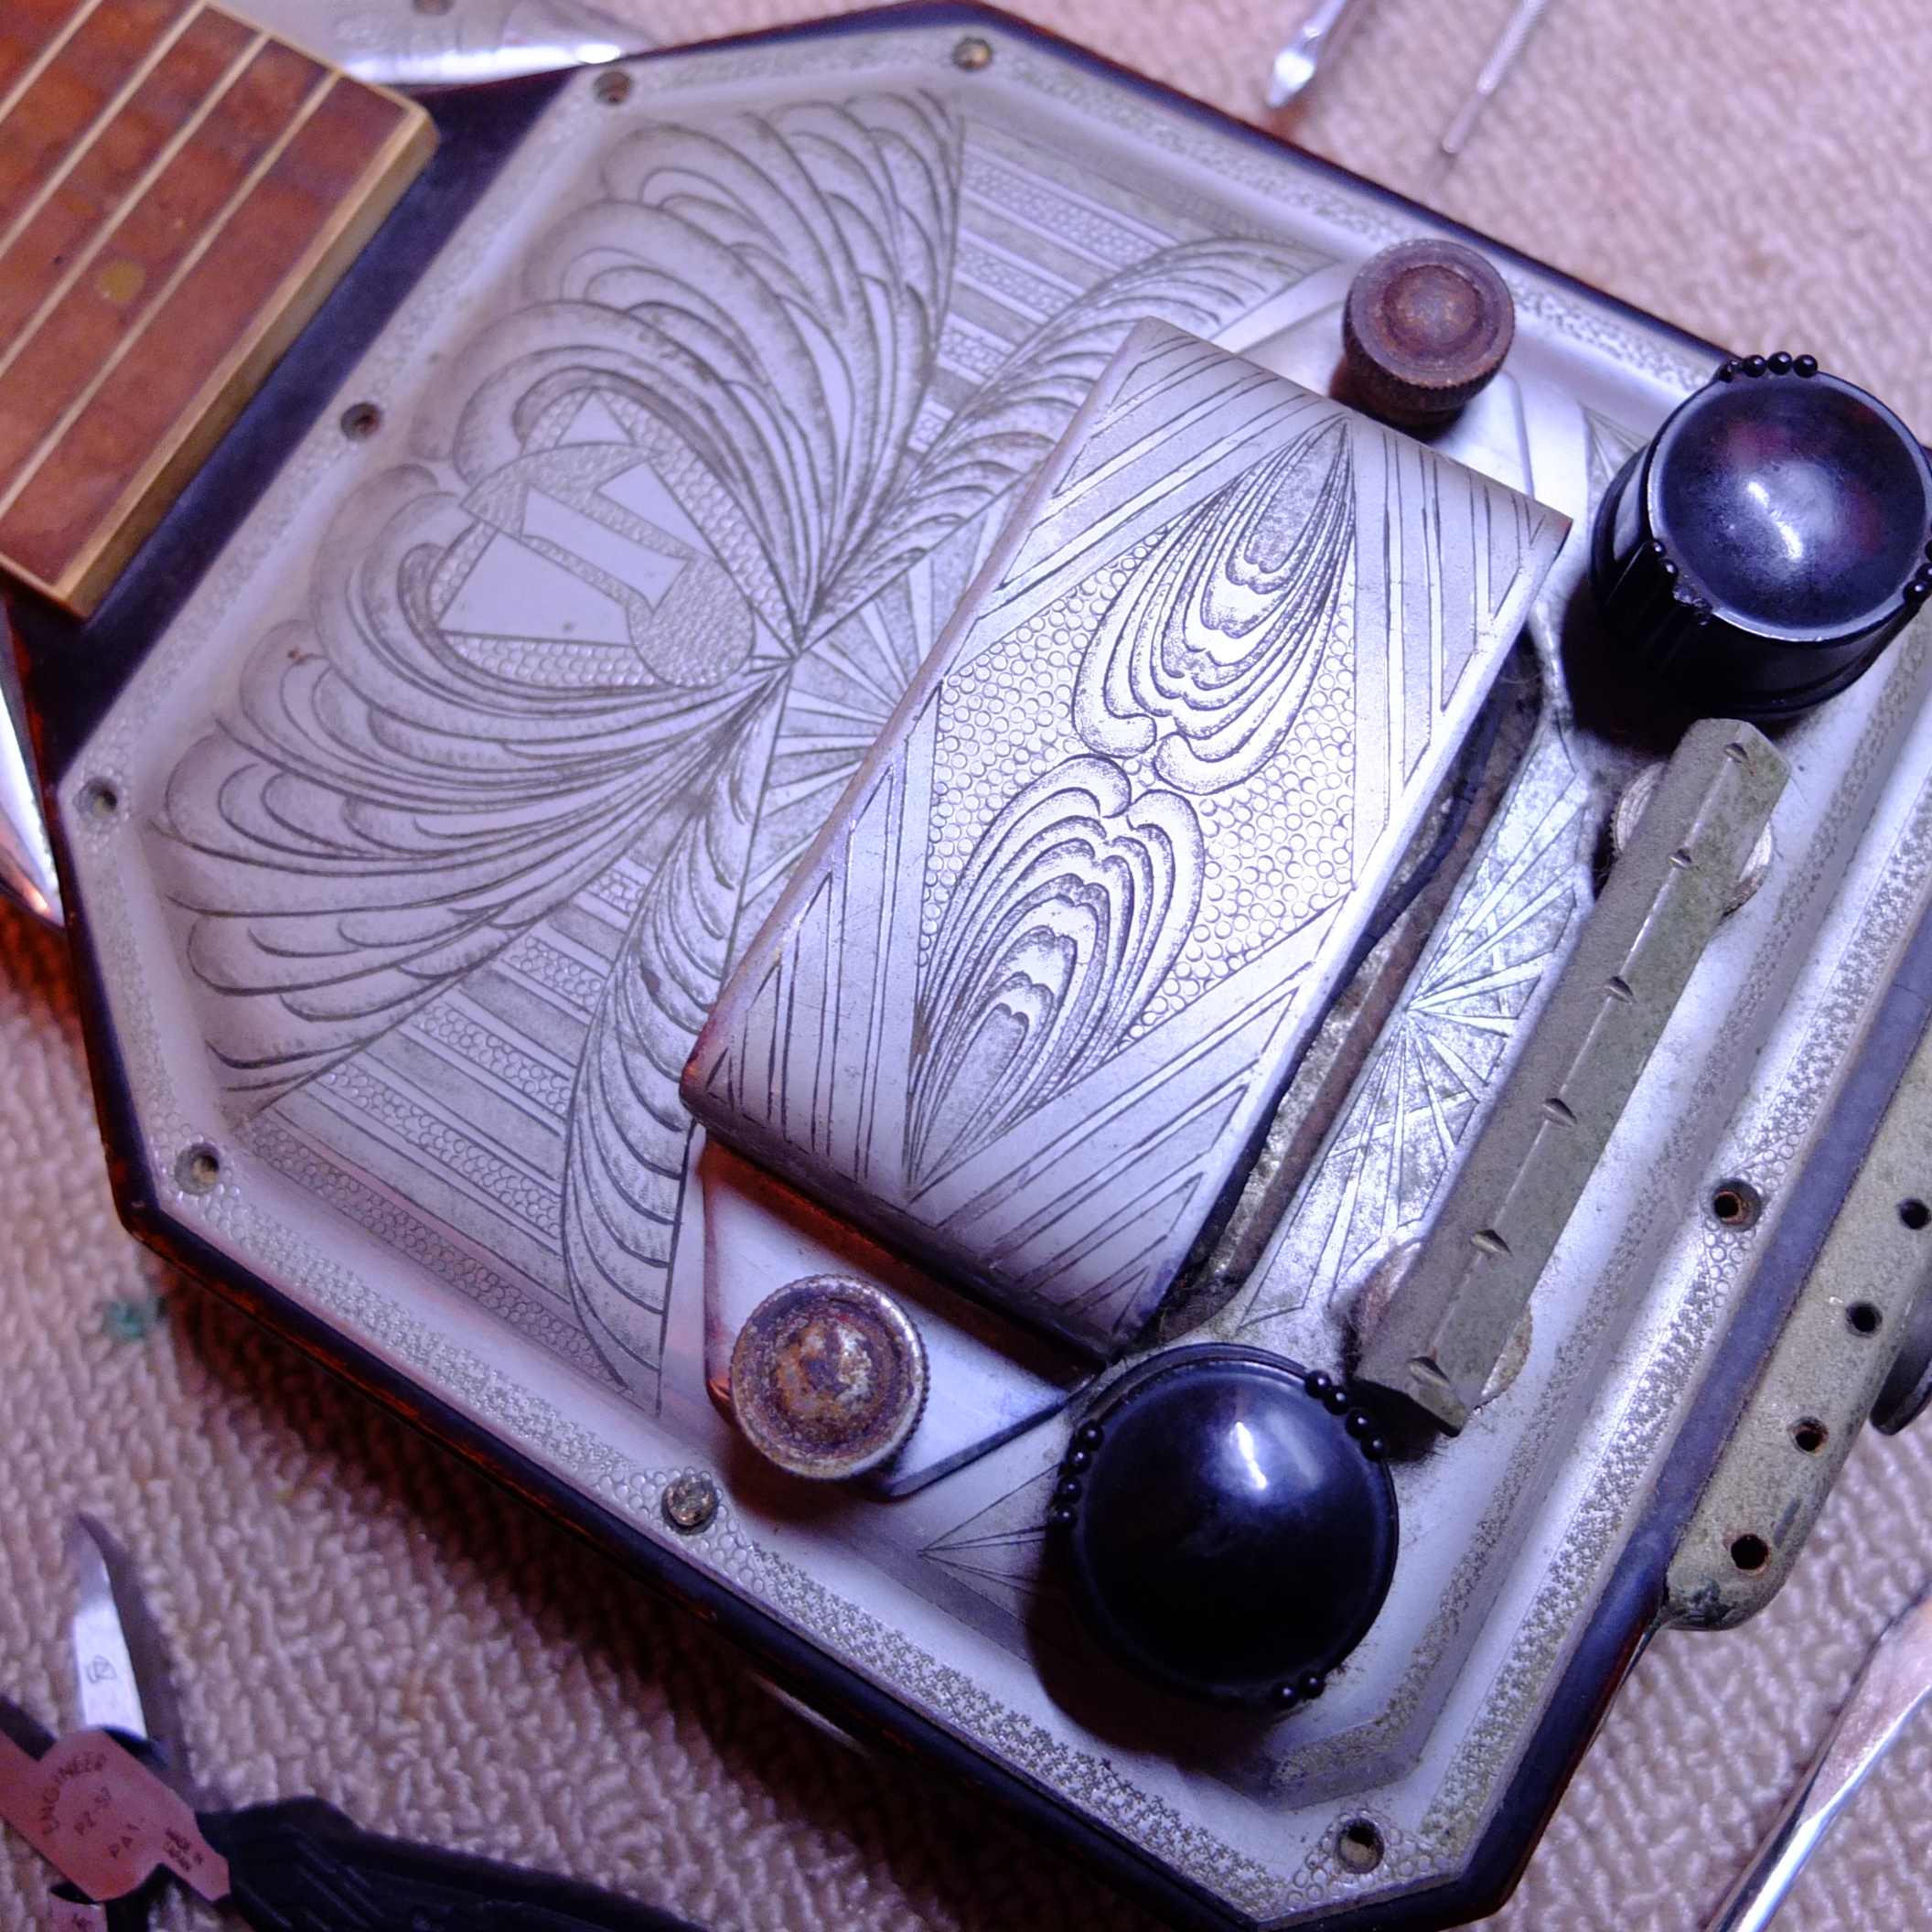
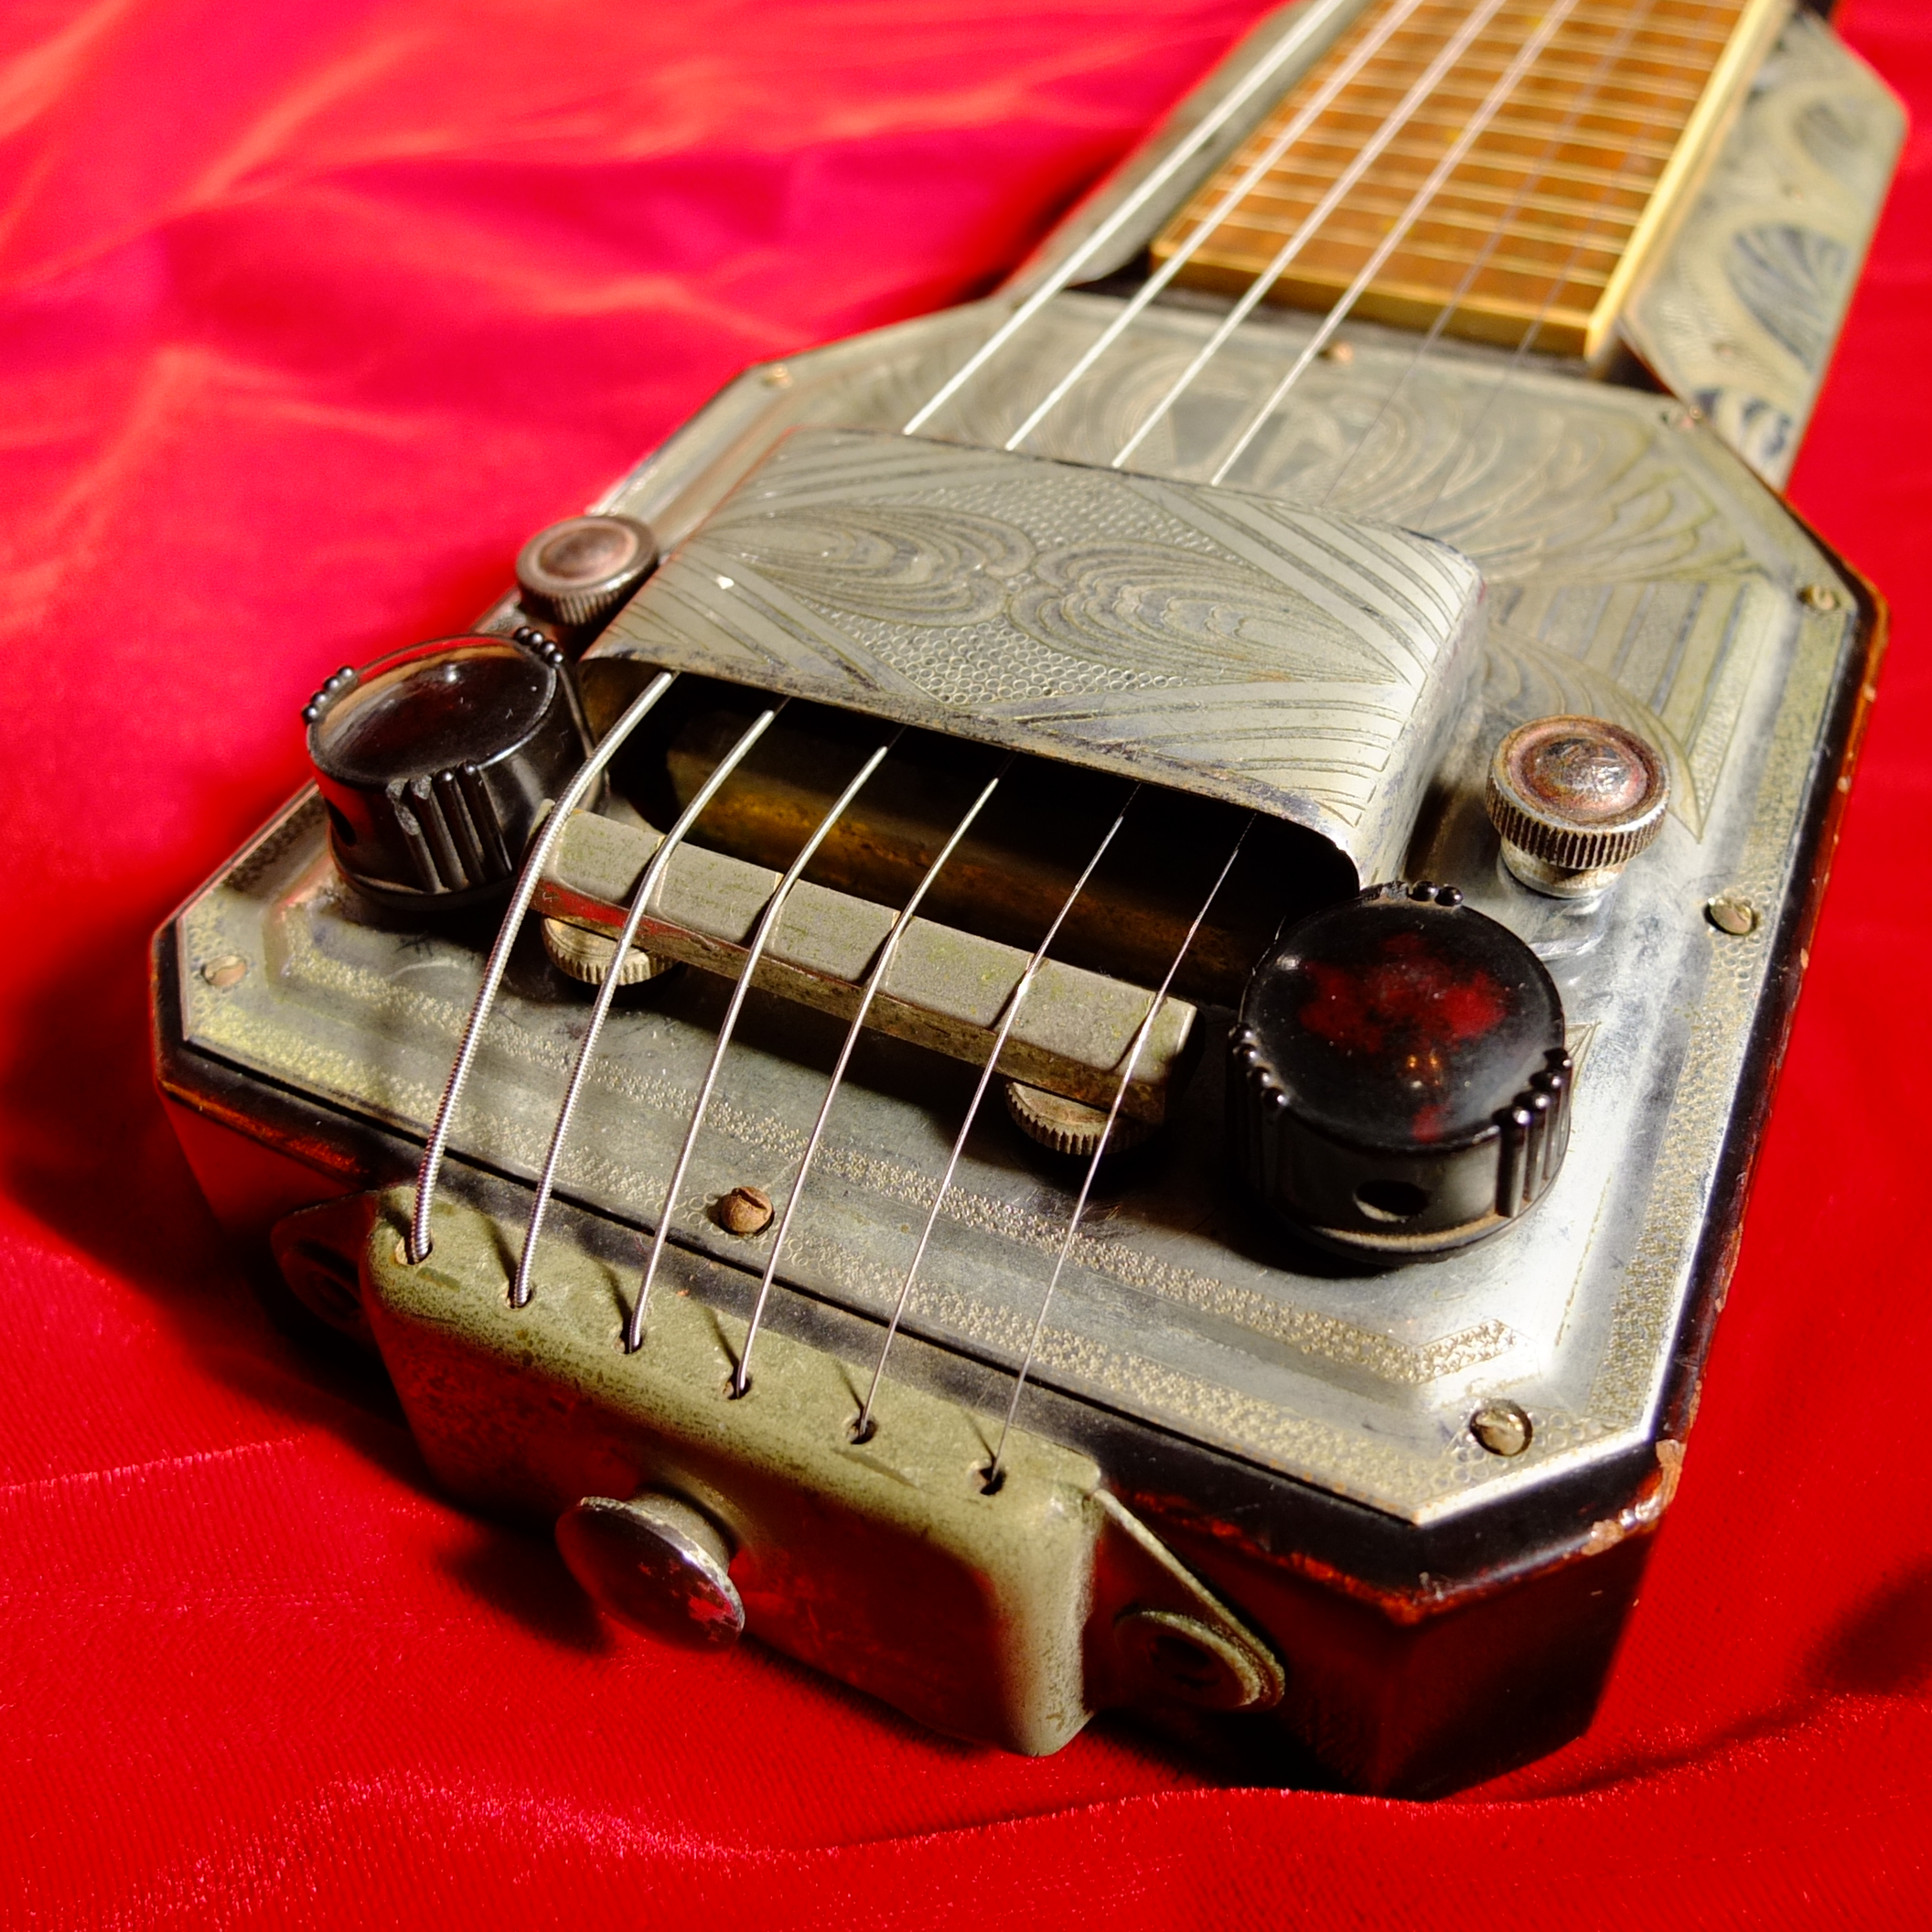
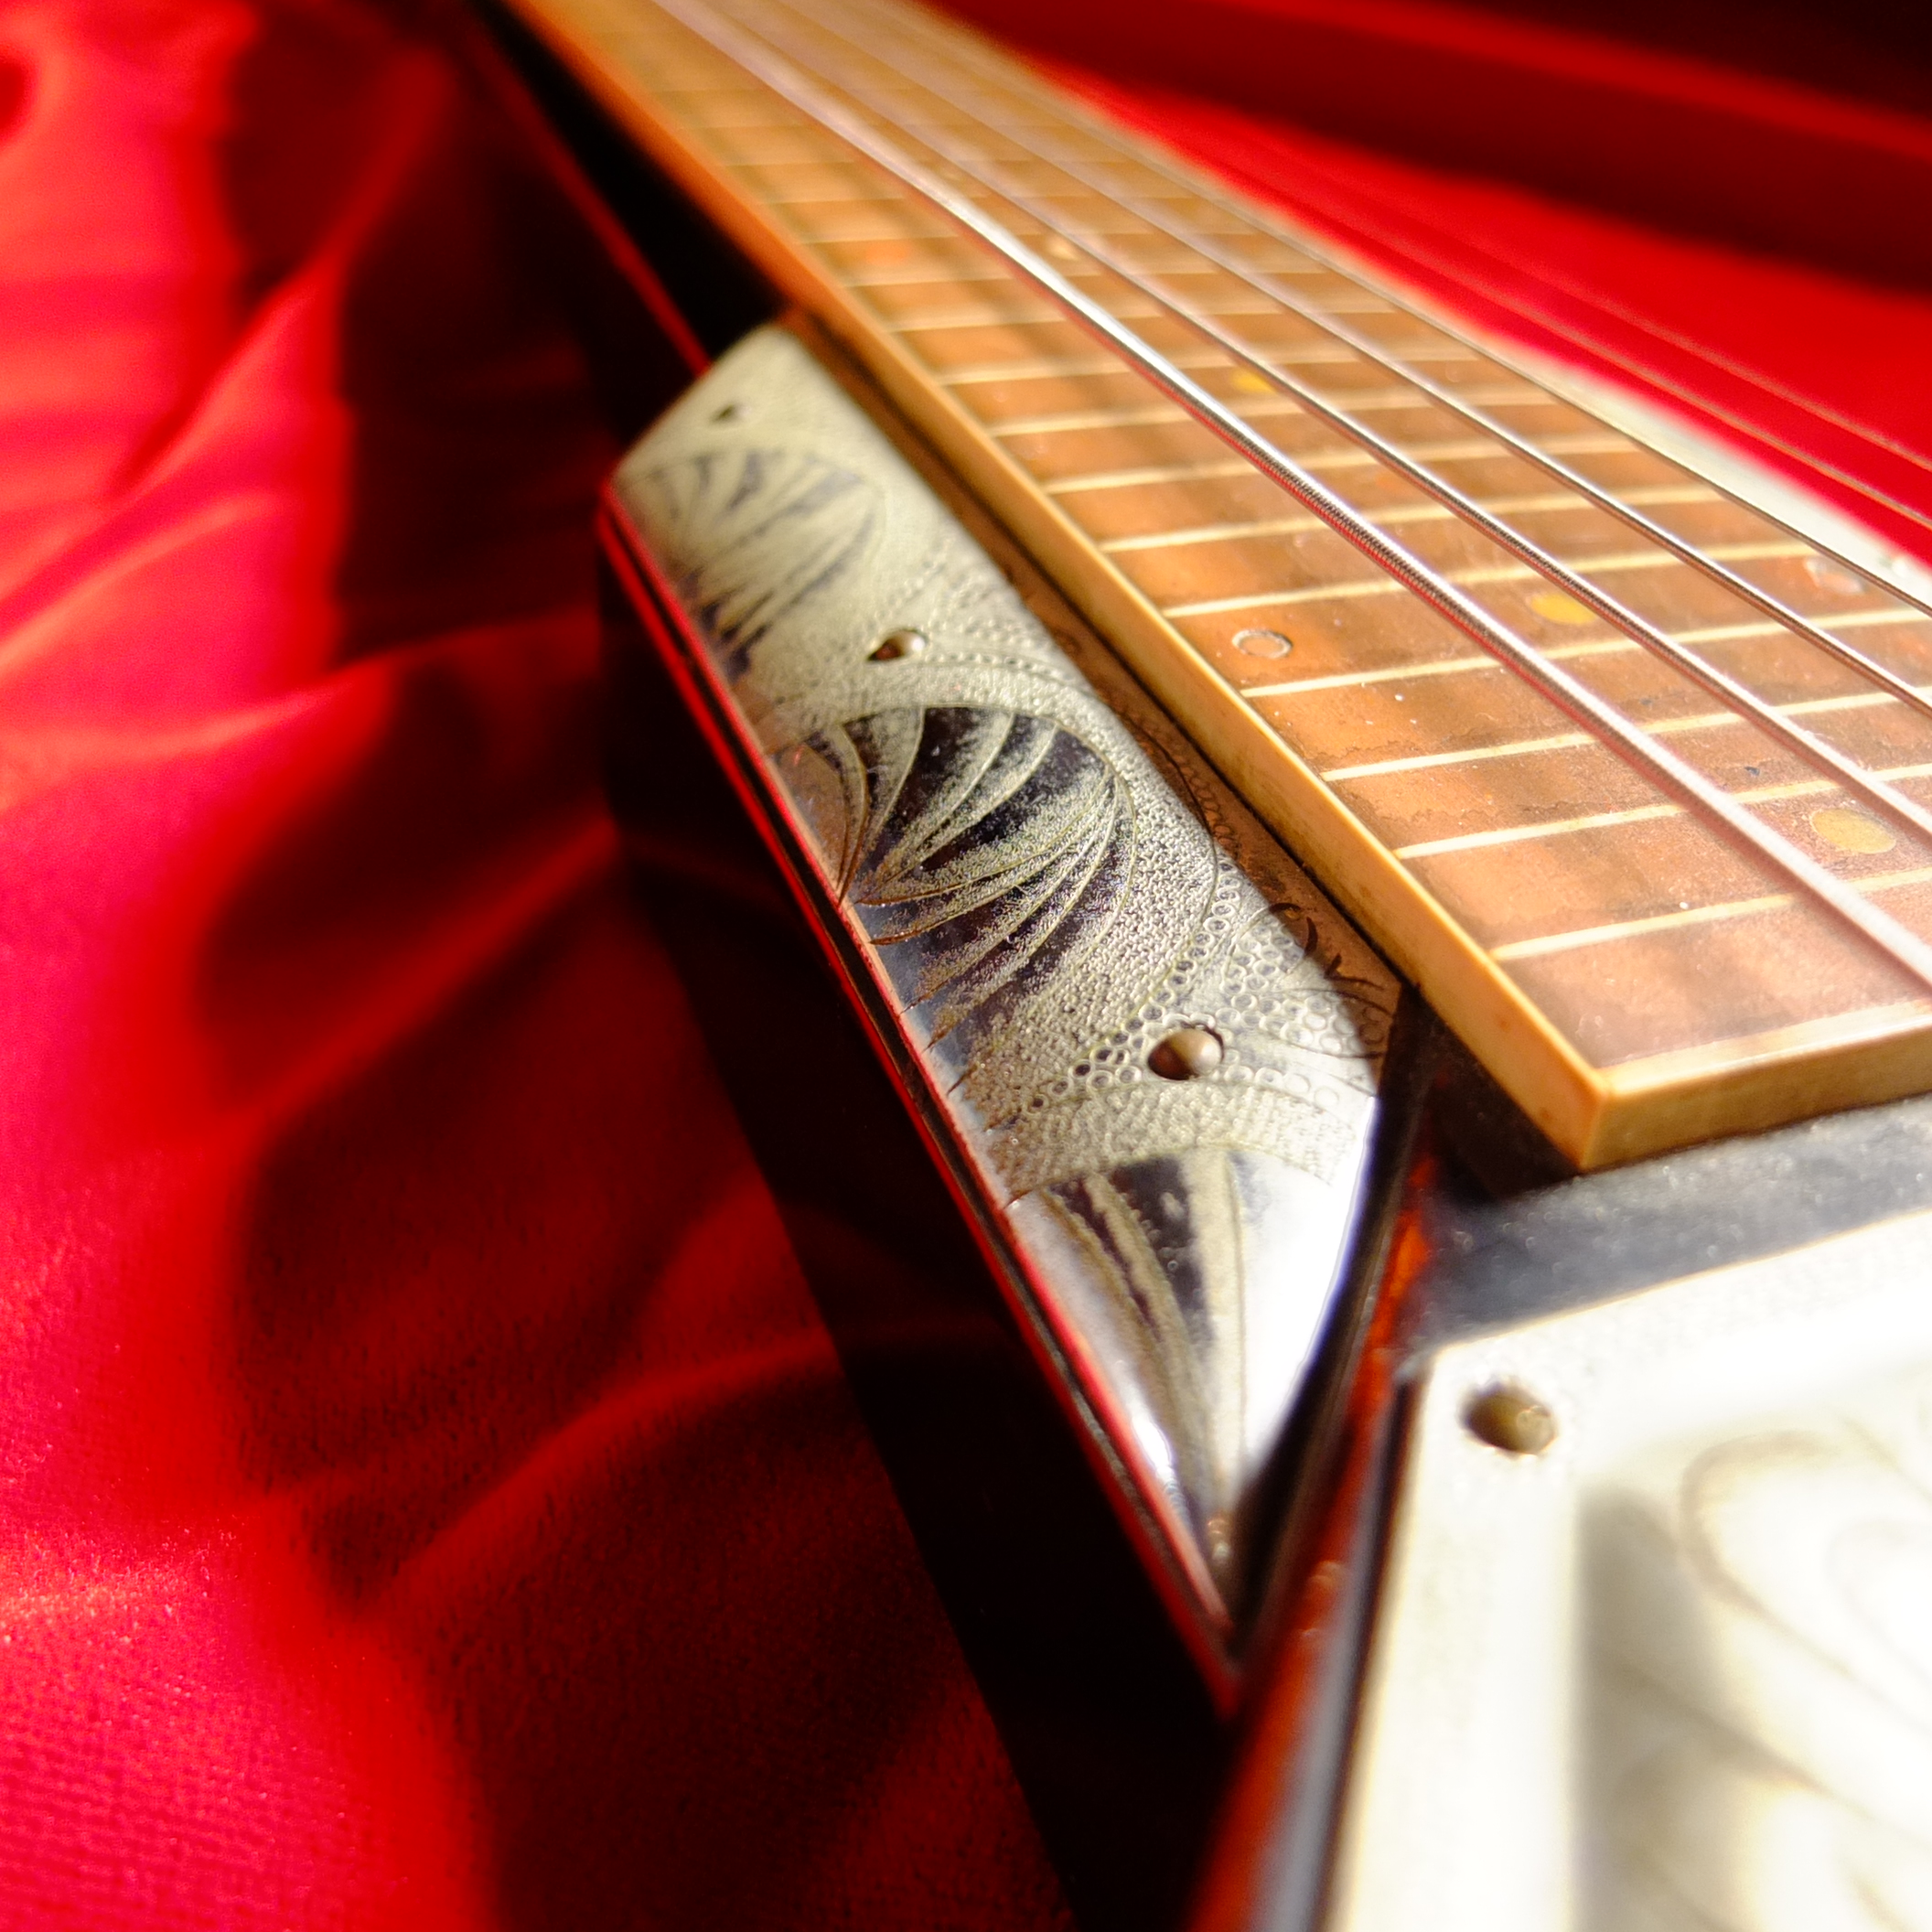
The triangle now has some cross lines, the musical note is black, and the number “1” has grown in size, but it’s undoubtedly the same emblem. So I had my brand. “Havana” – now it was time to start repairing the guitar. But first, let’s admire some more of that metal work:
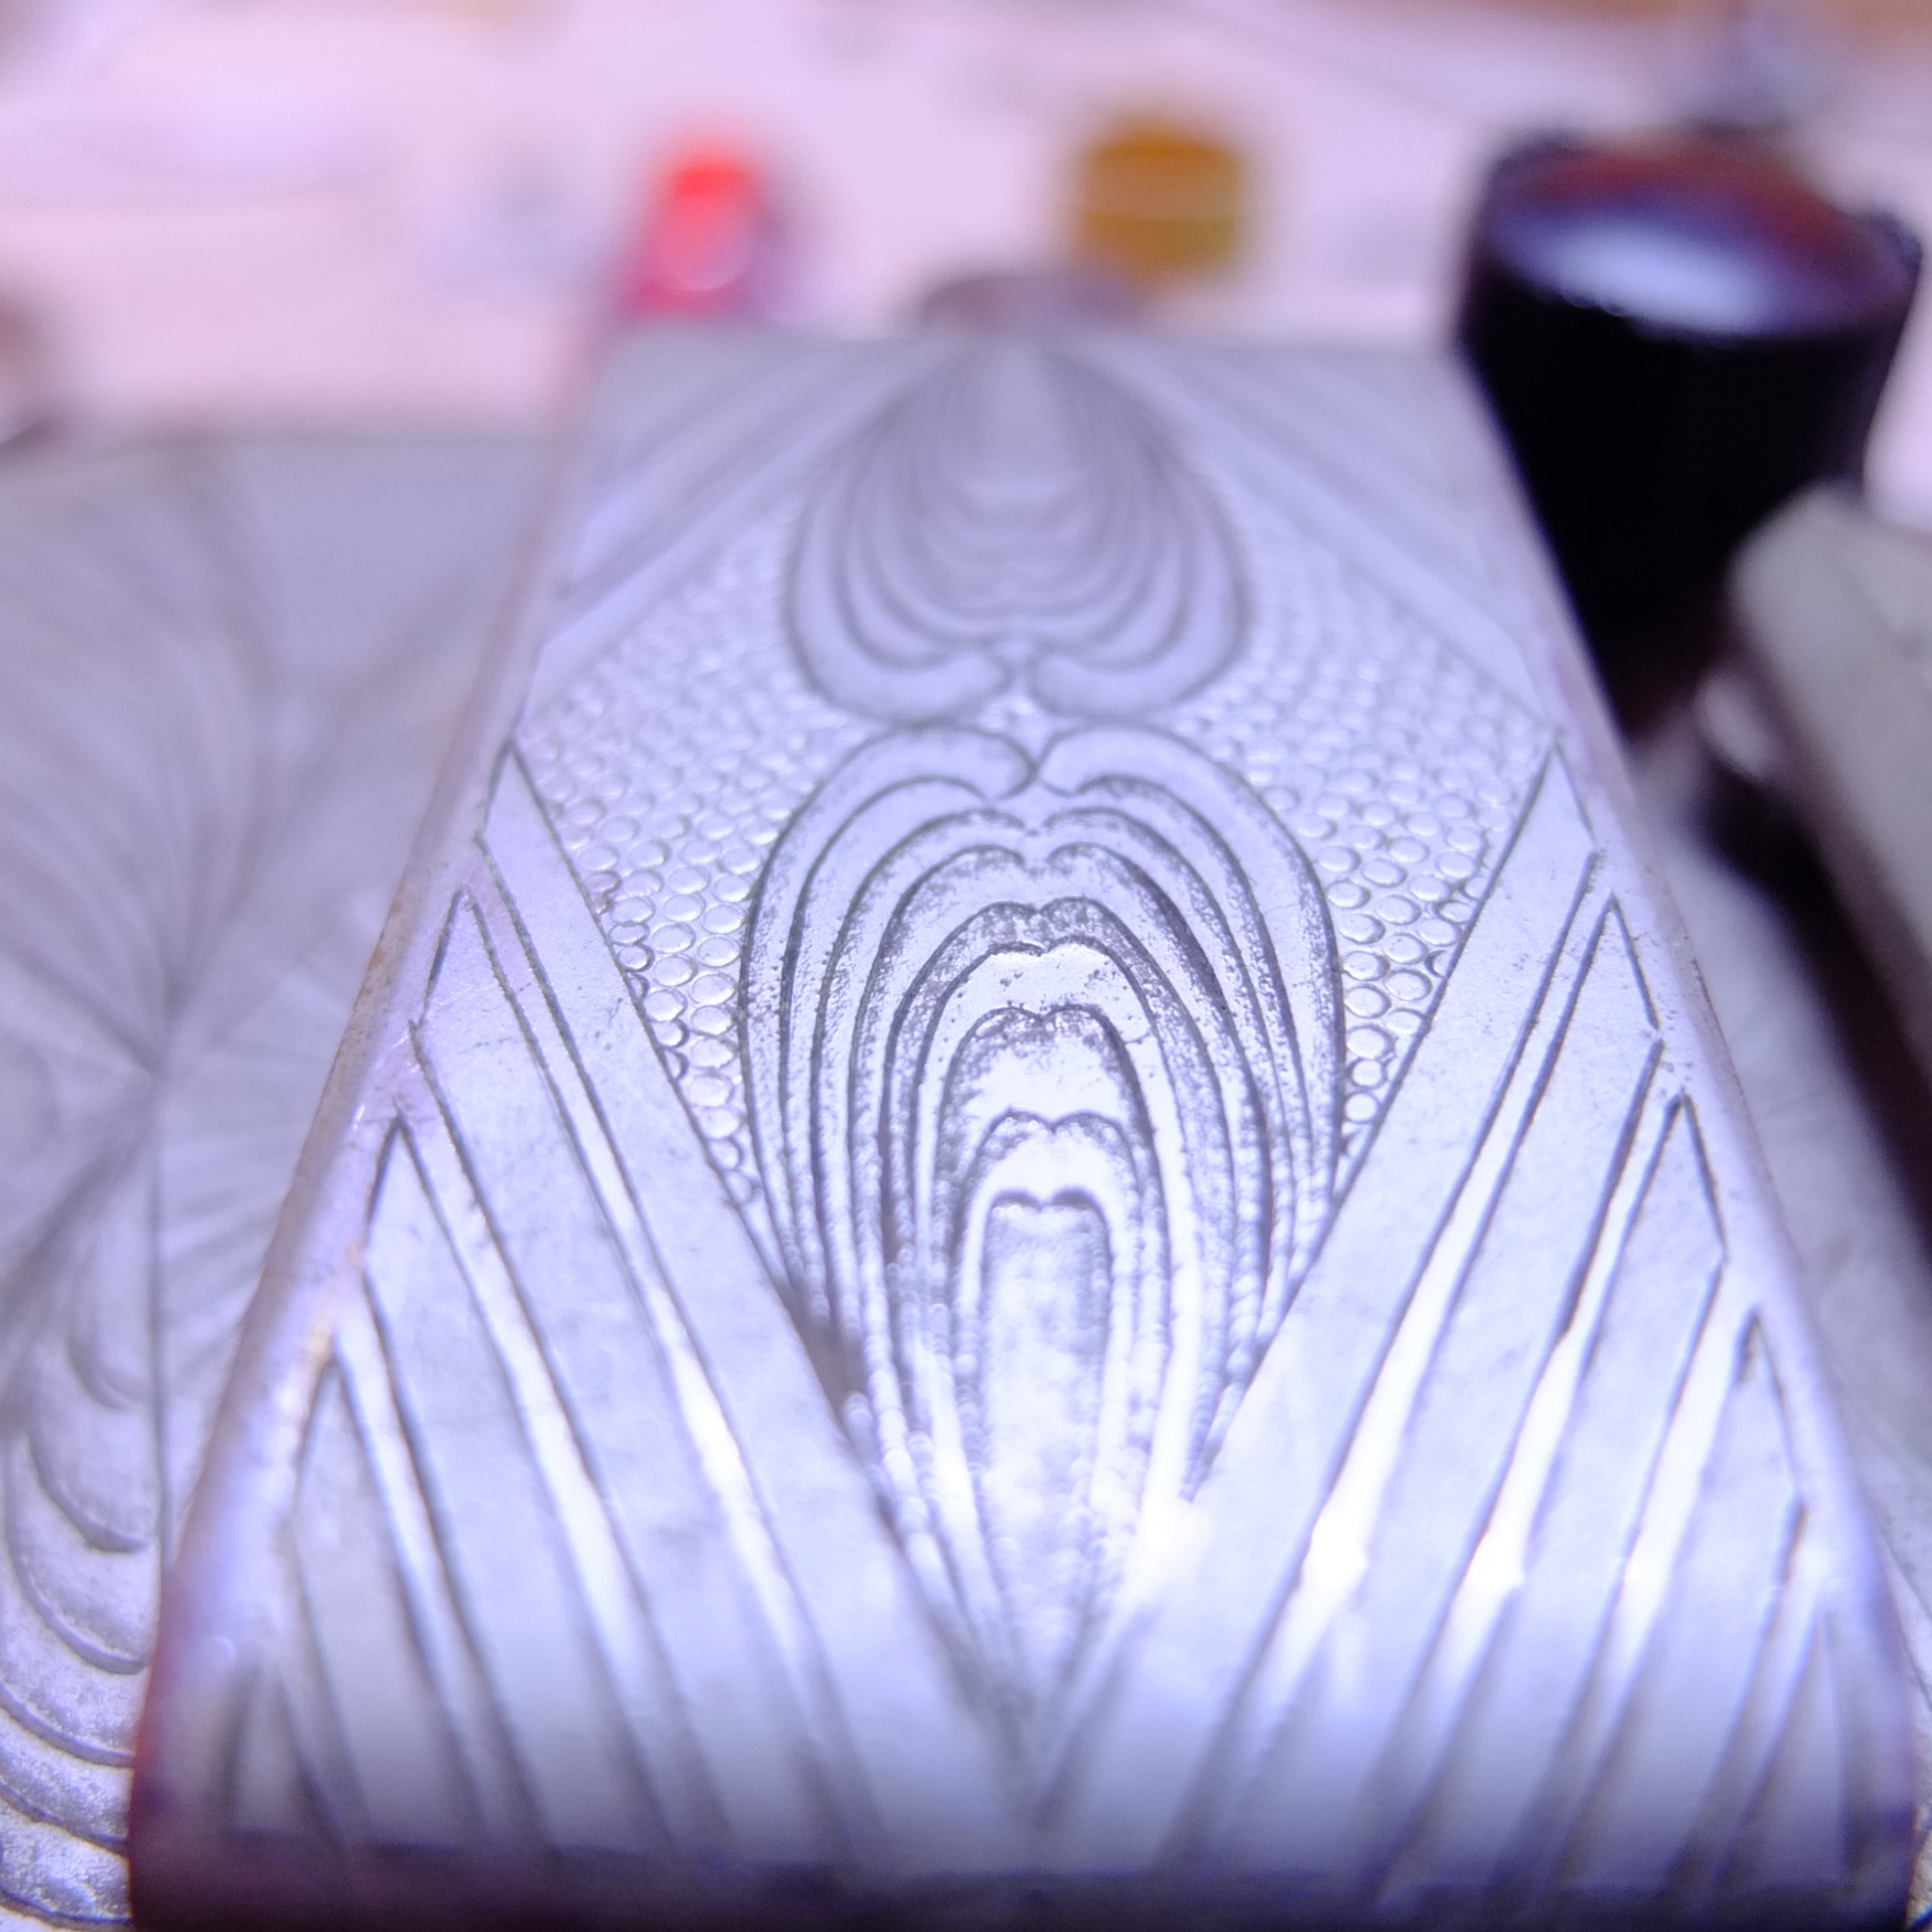
I’m a sucker for stuff like this. But I have to get in there and figure out why there’s no output on this guitar:
Almost ever single one of the old flat head screws had the heads stripped, but luckily I have a set of pliers which will grab the screw head from the outside and allow me to remove them that way. None of the screws were broken, which fortunately meant no drilling.
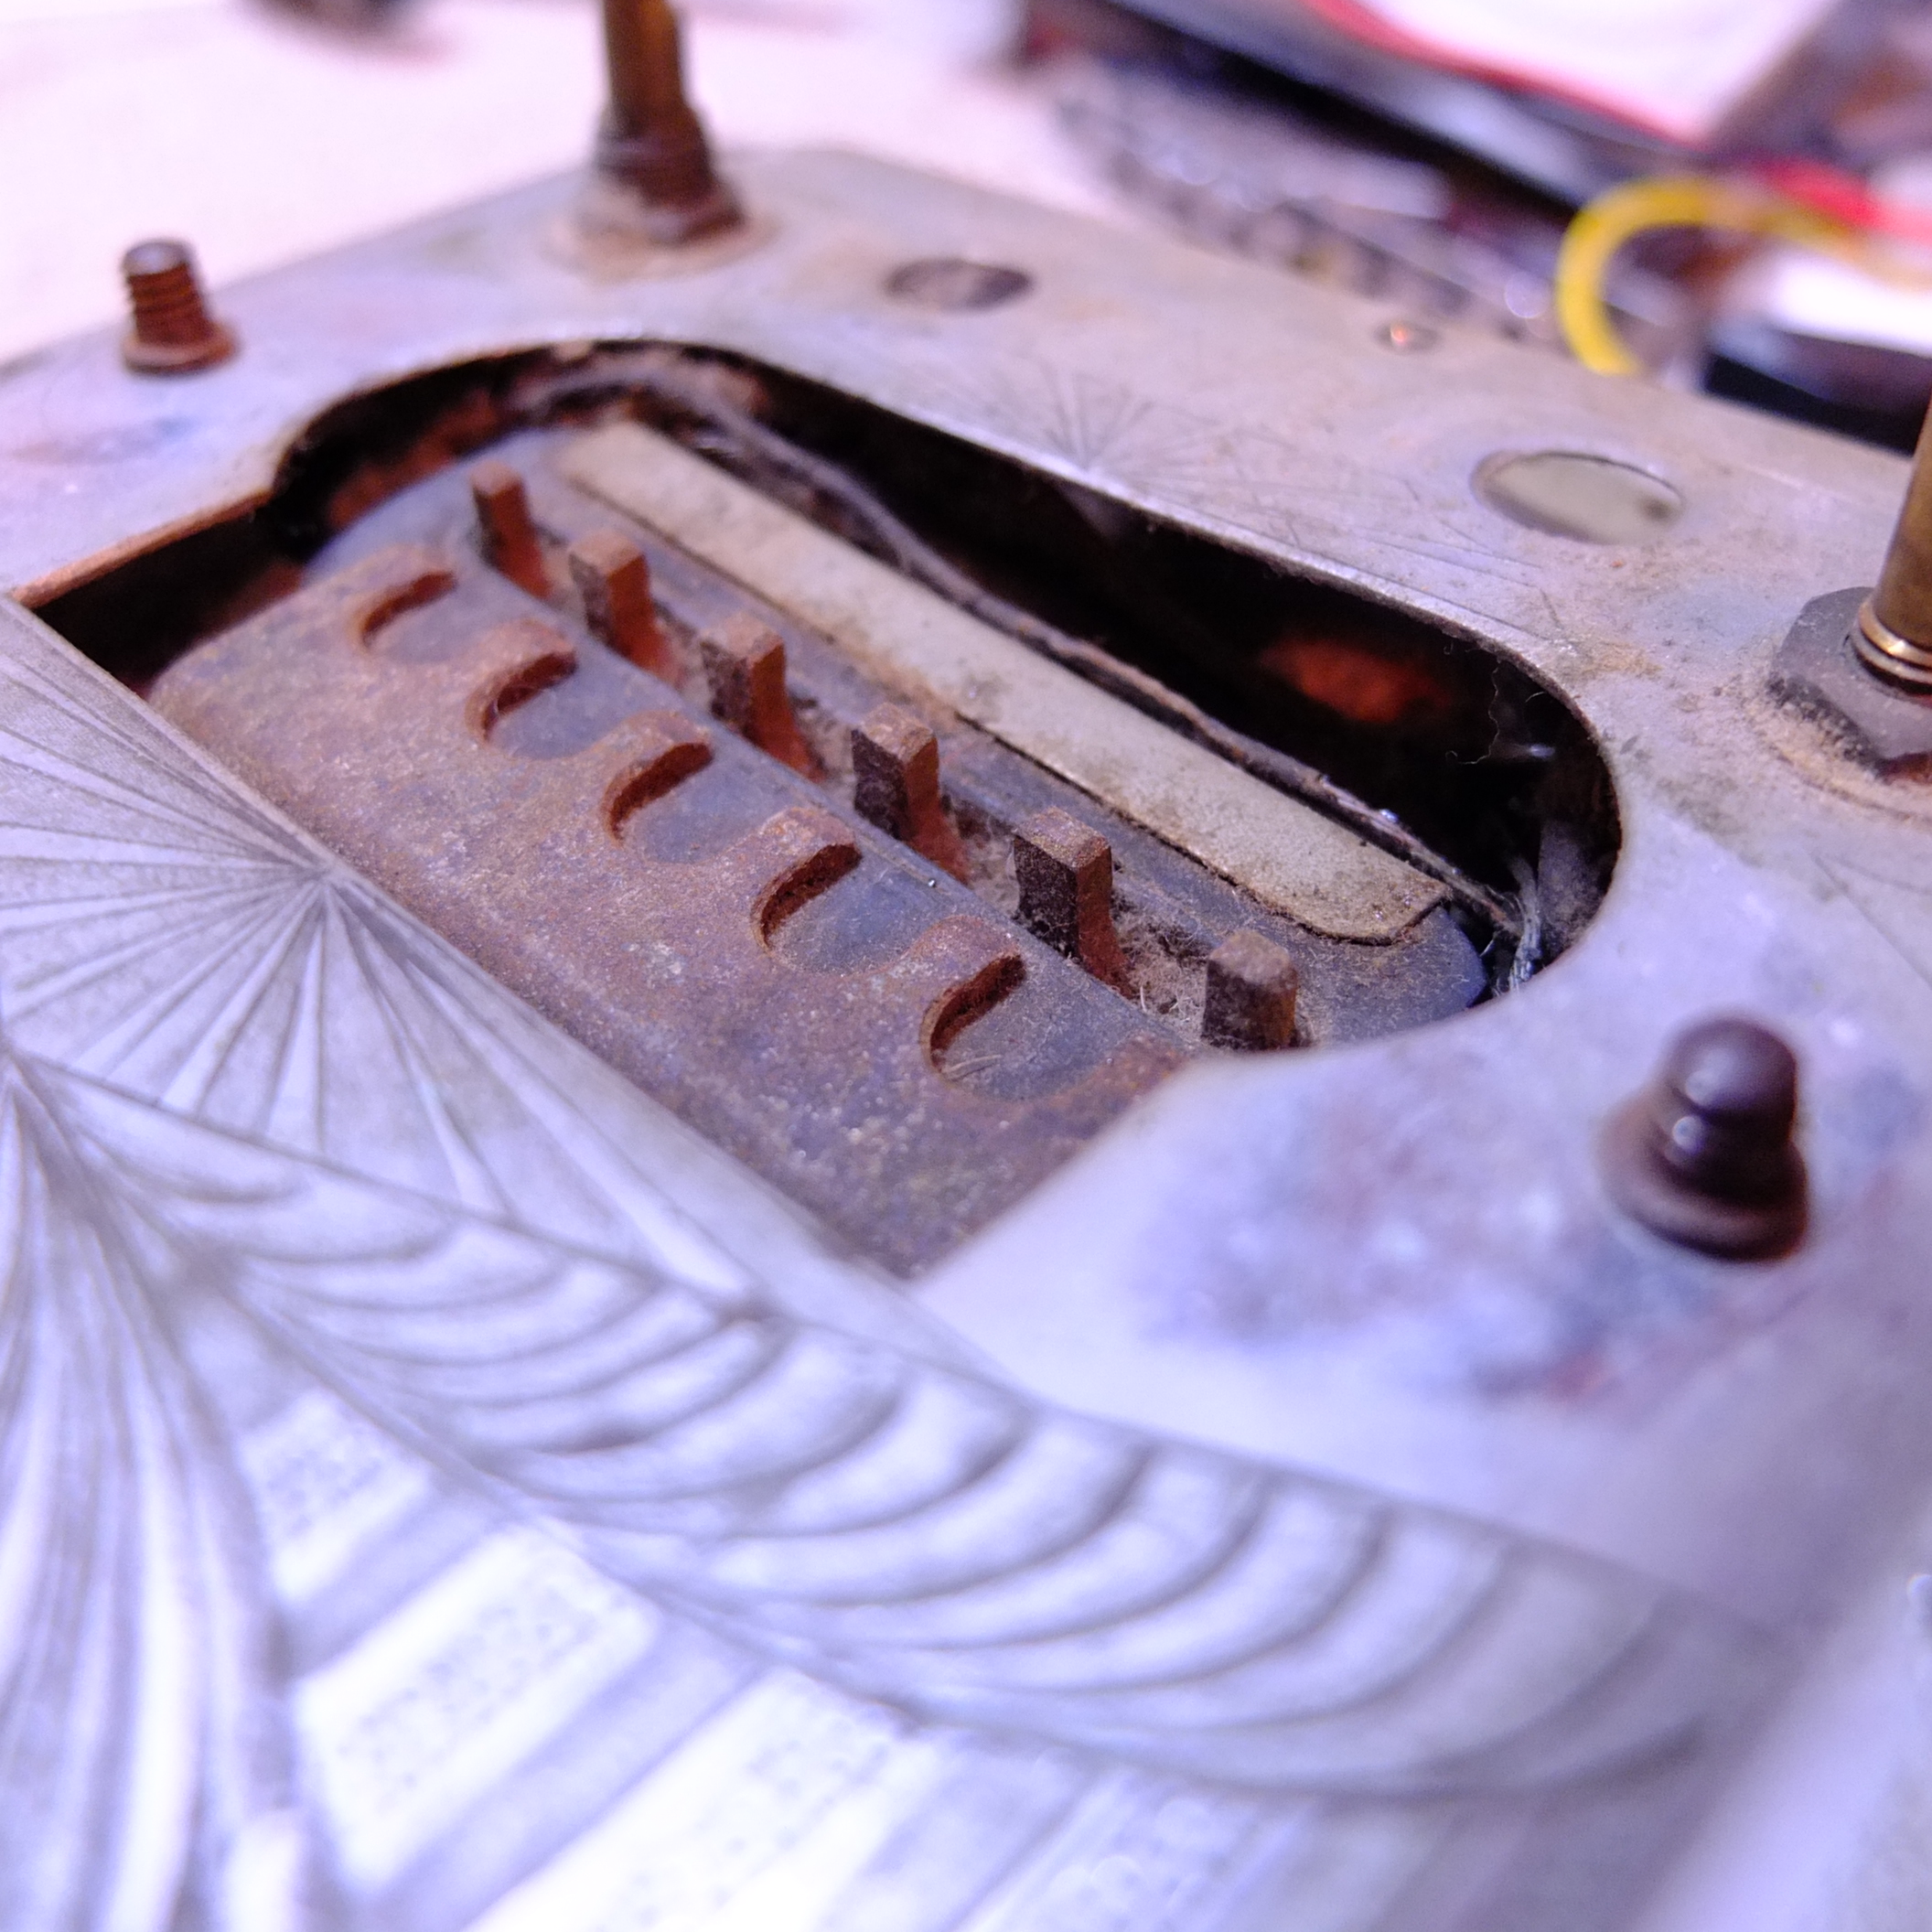
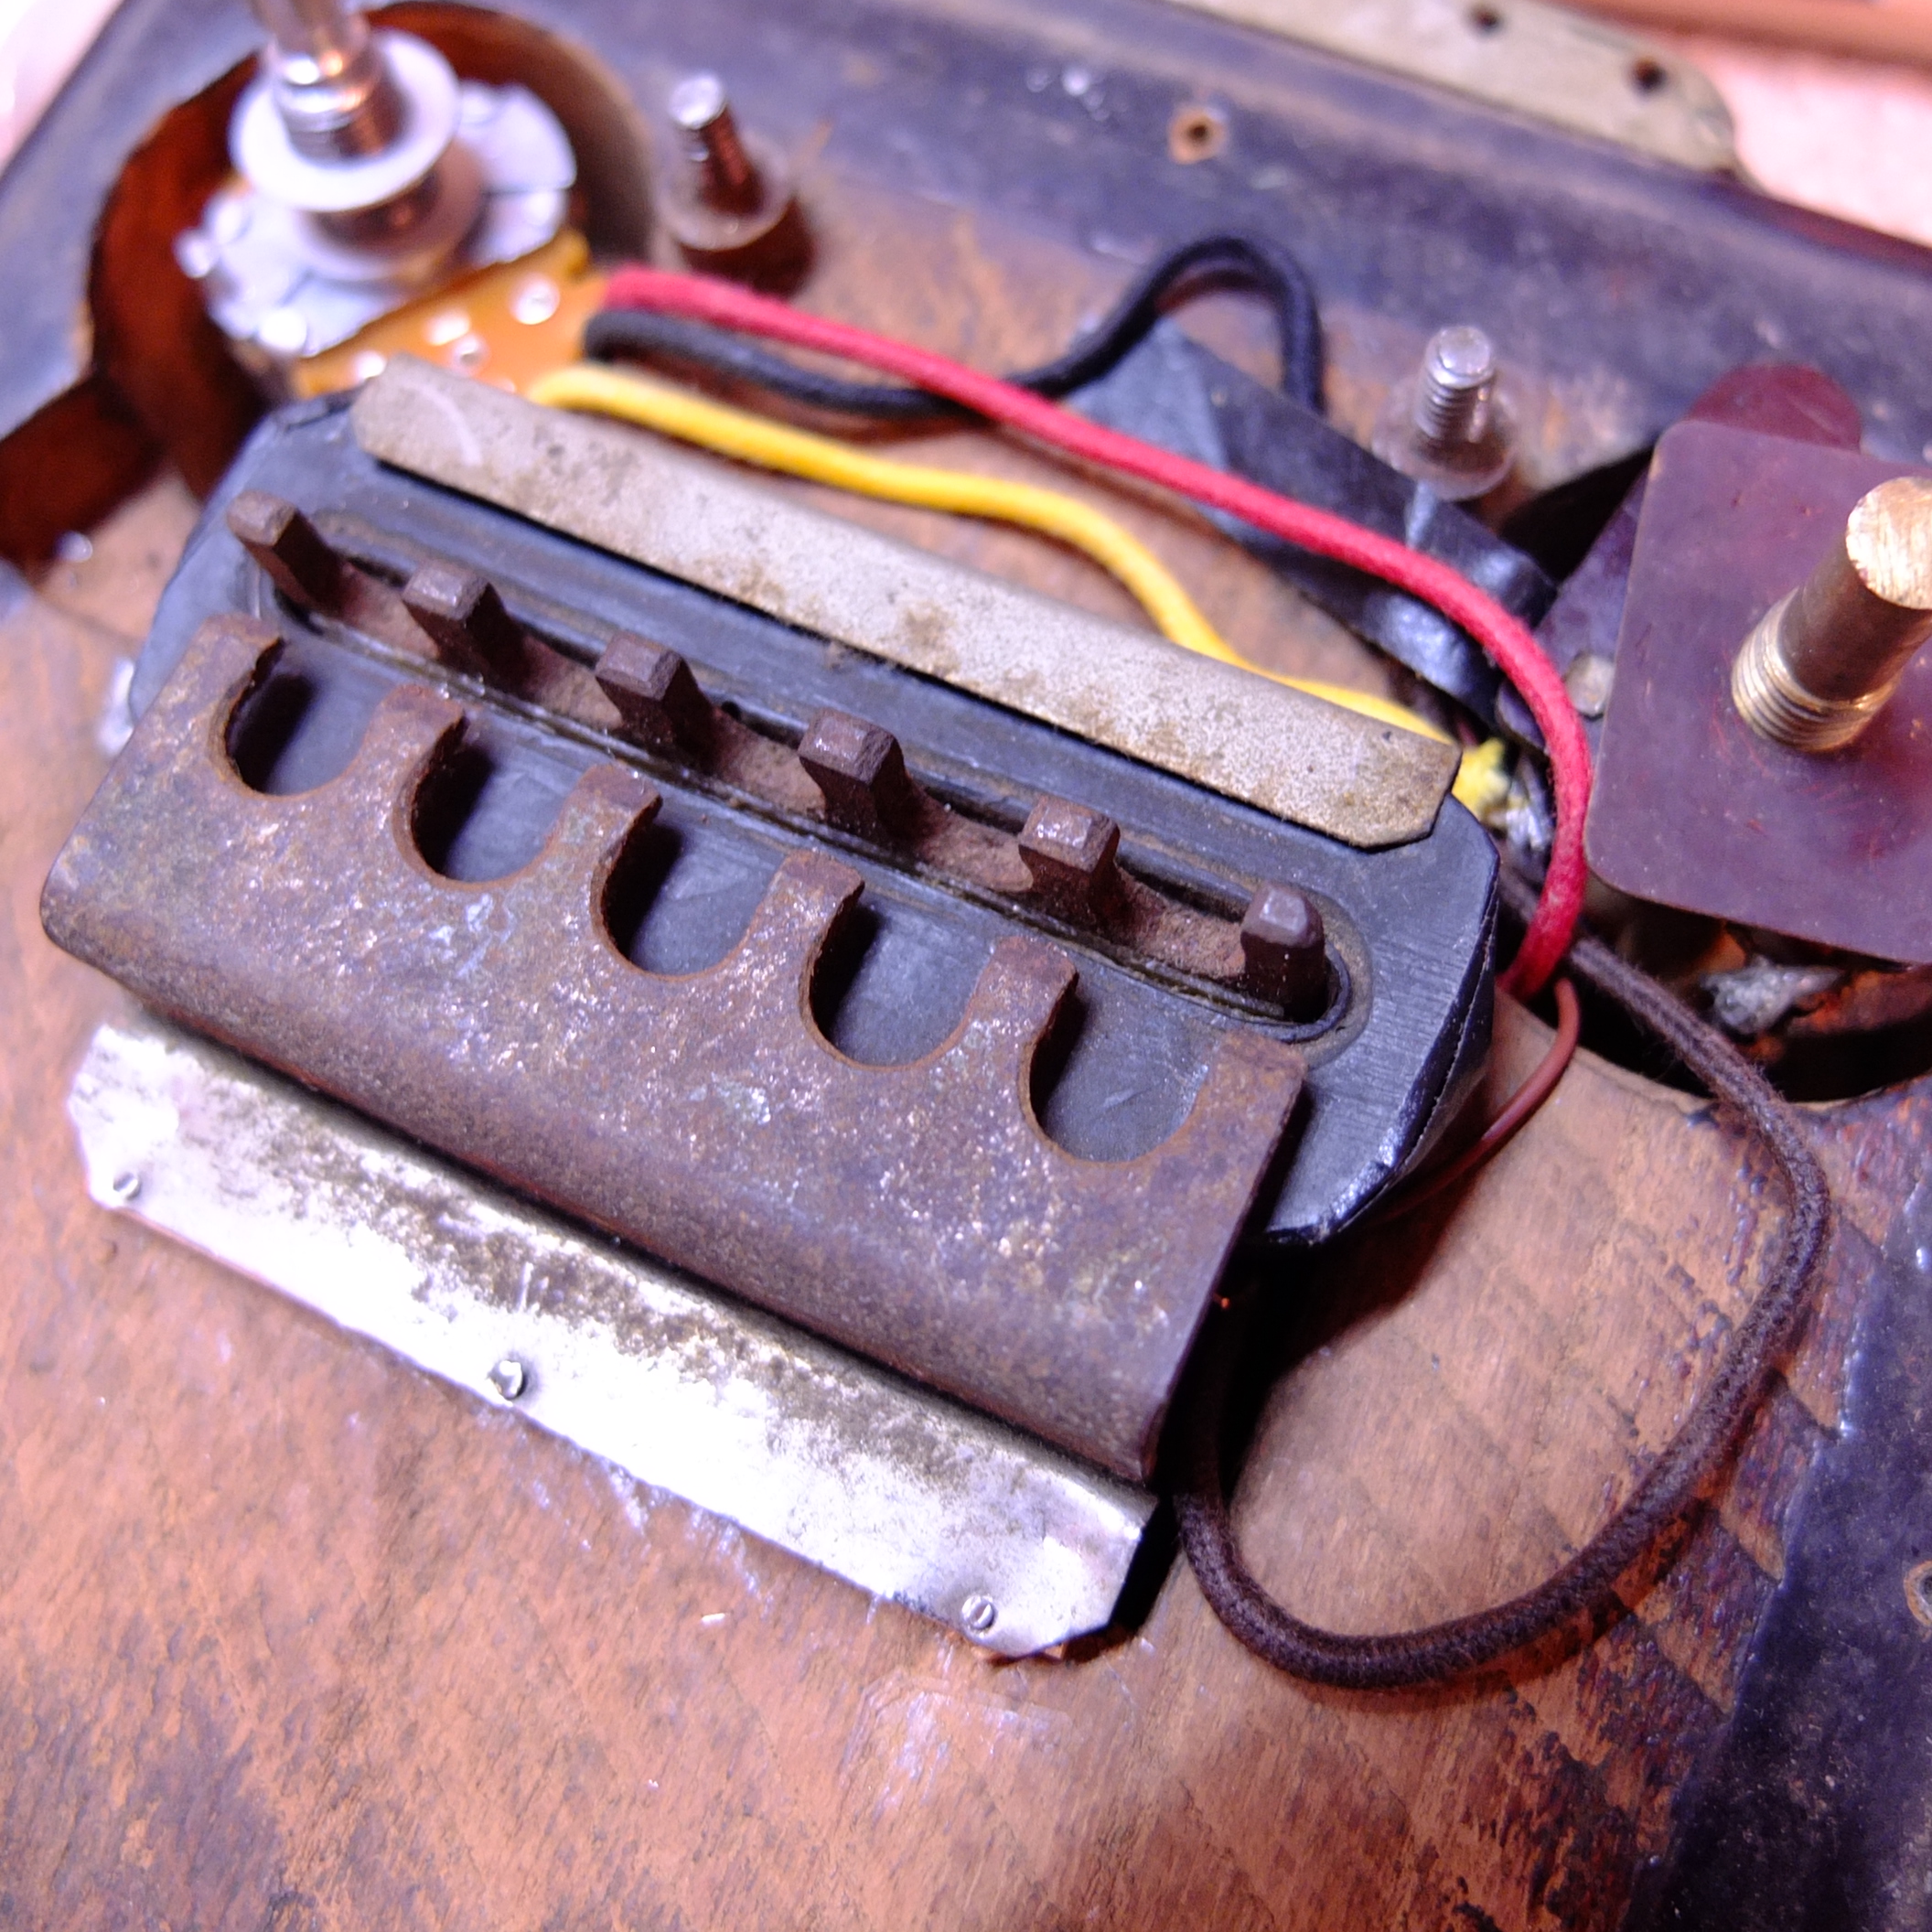
Pickup cover removed and we can see the pickup and claw.
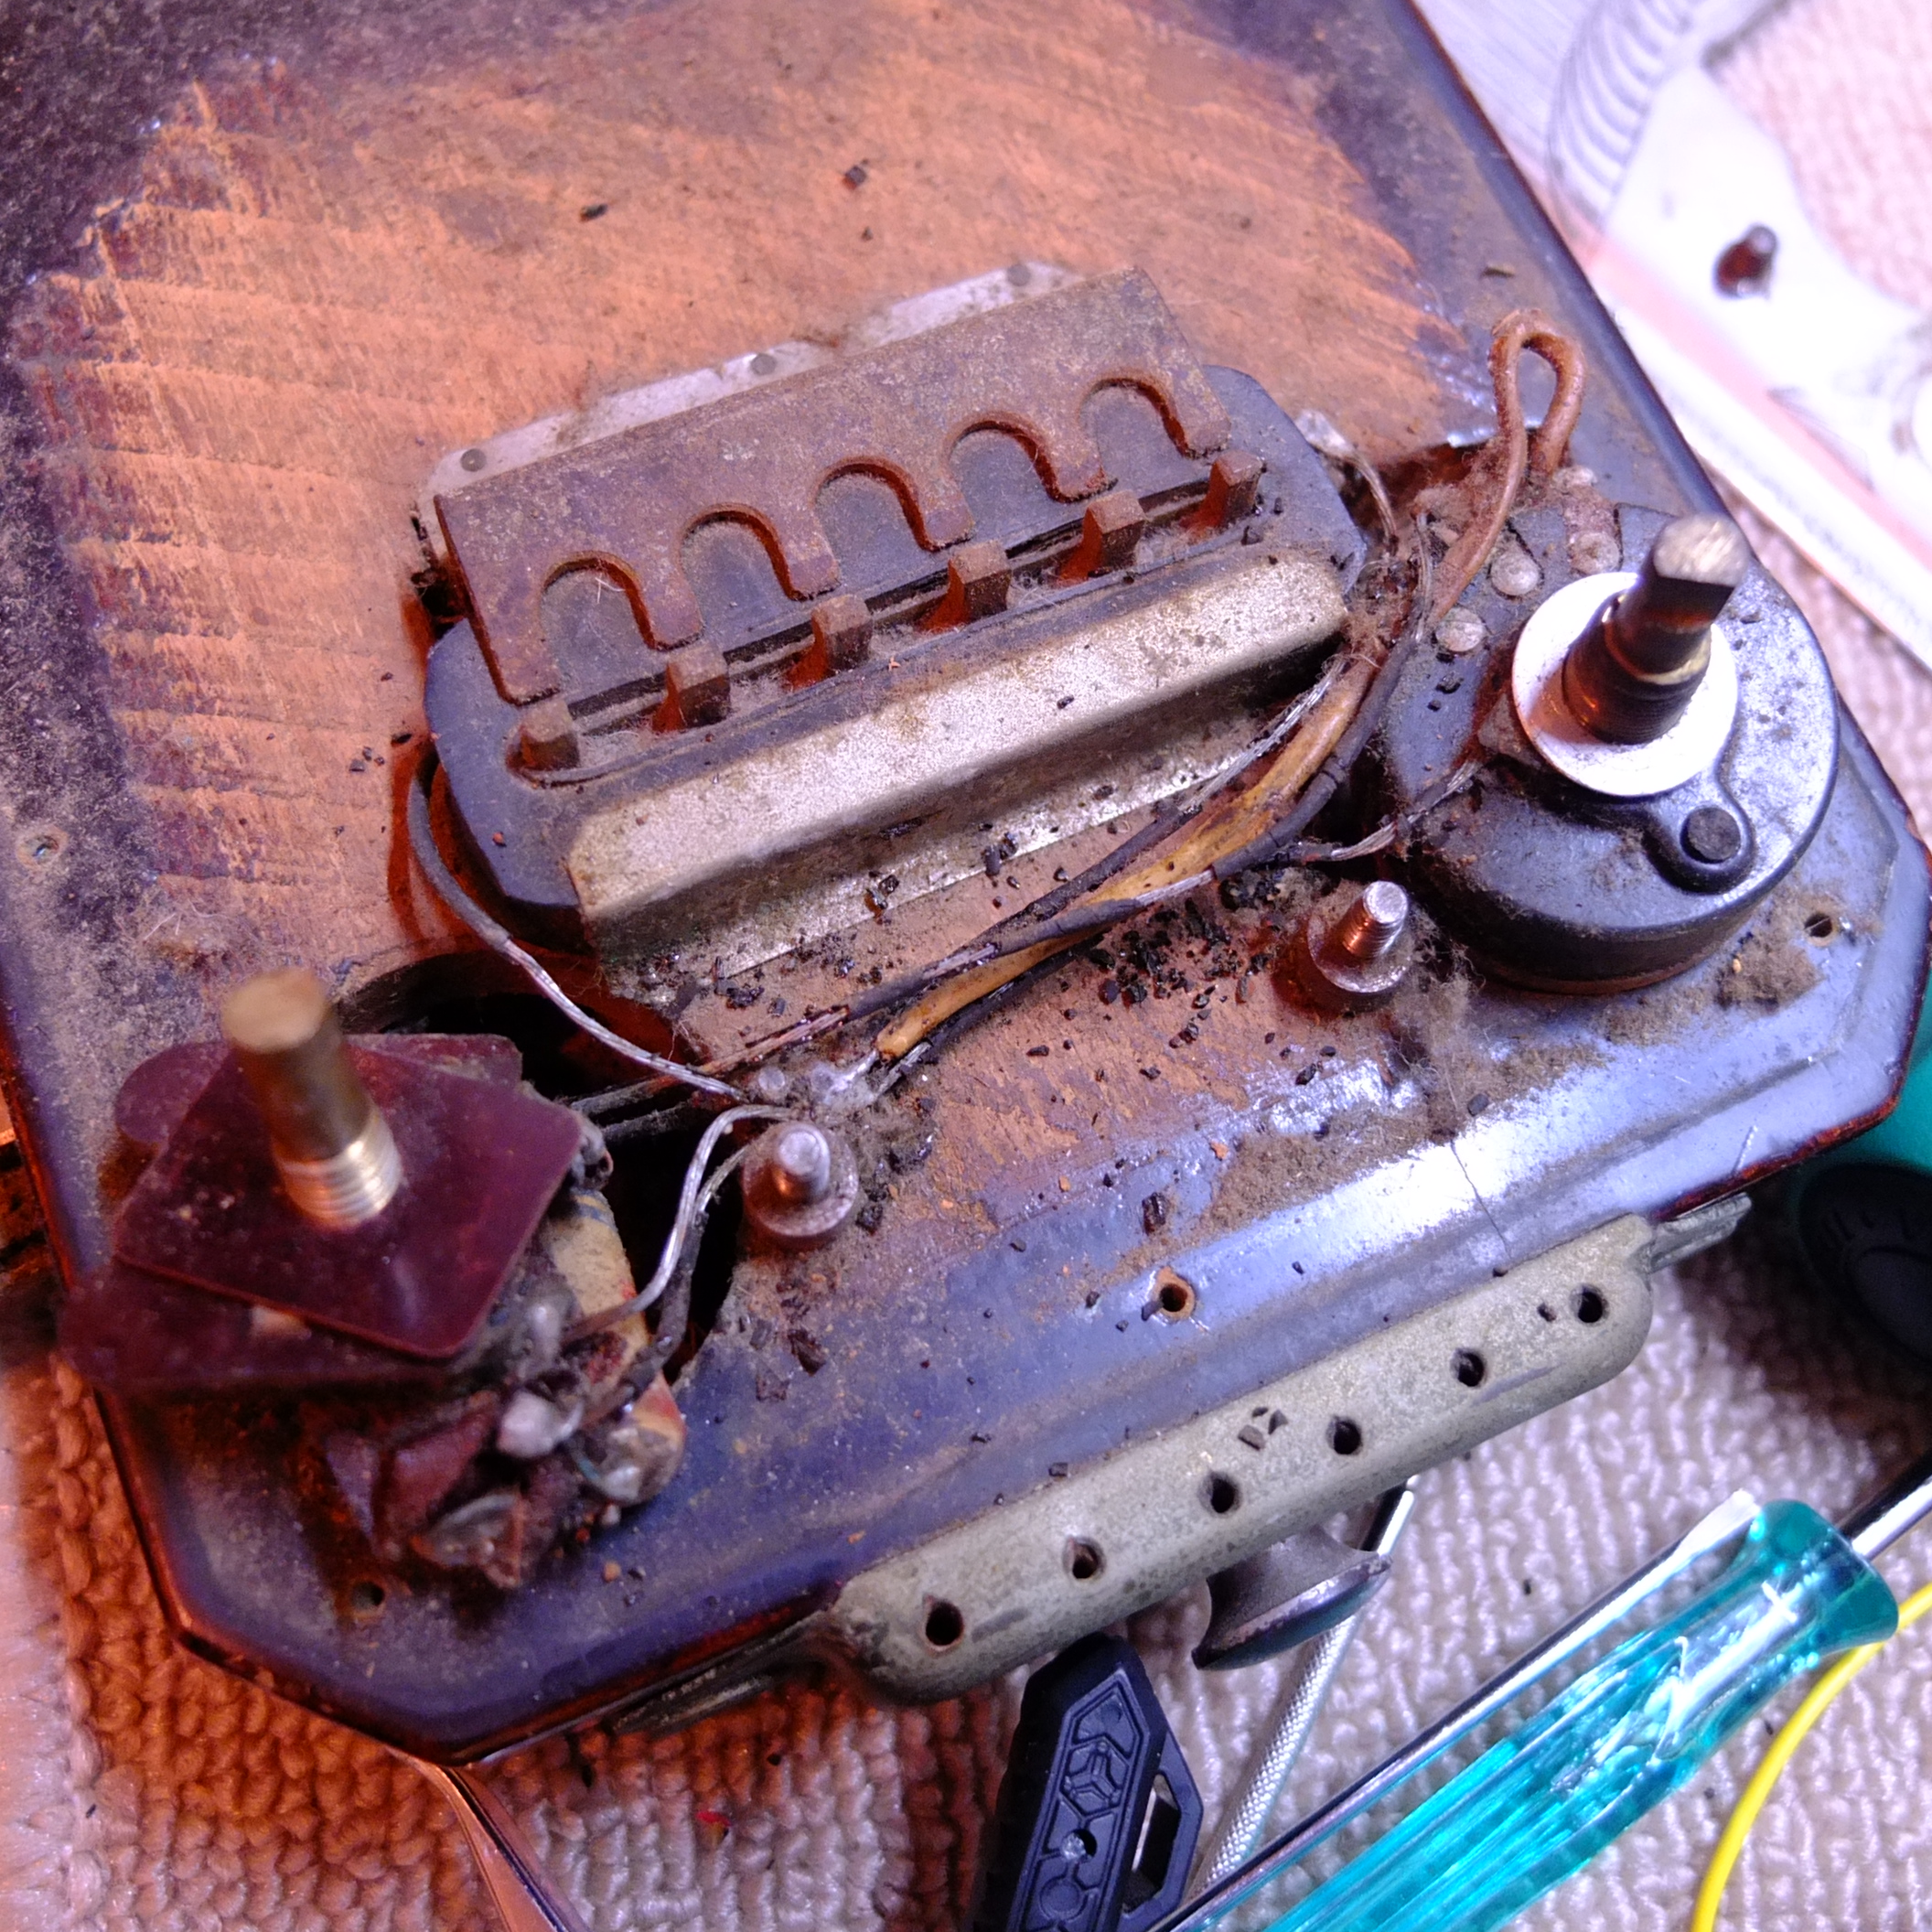
And now with the cover plate removed, we can see the problem with the output. Lots of crumbling insulation. In fact, some of the wires are practically bare. I’m sure the problem goes beyond that as well. But look at that volume pot – very indicative of the late 1940s early 1950s. Notice that the body is a solid block of Mahogany as well. This was a nice guitar. Part of freeing the wiring on this involves removing the input jack:

Holy cow! Look at that thing.
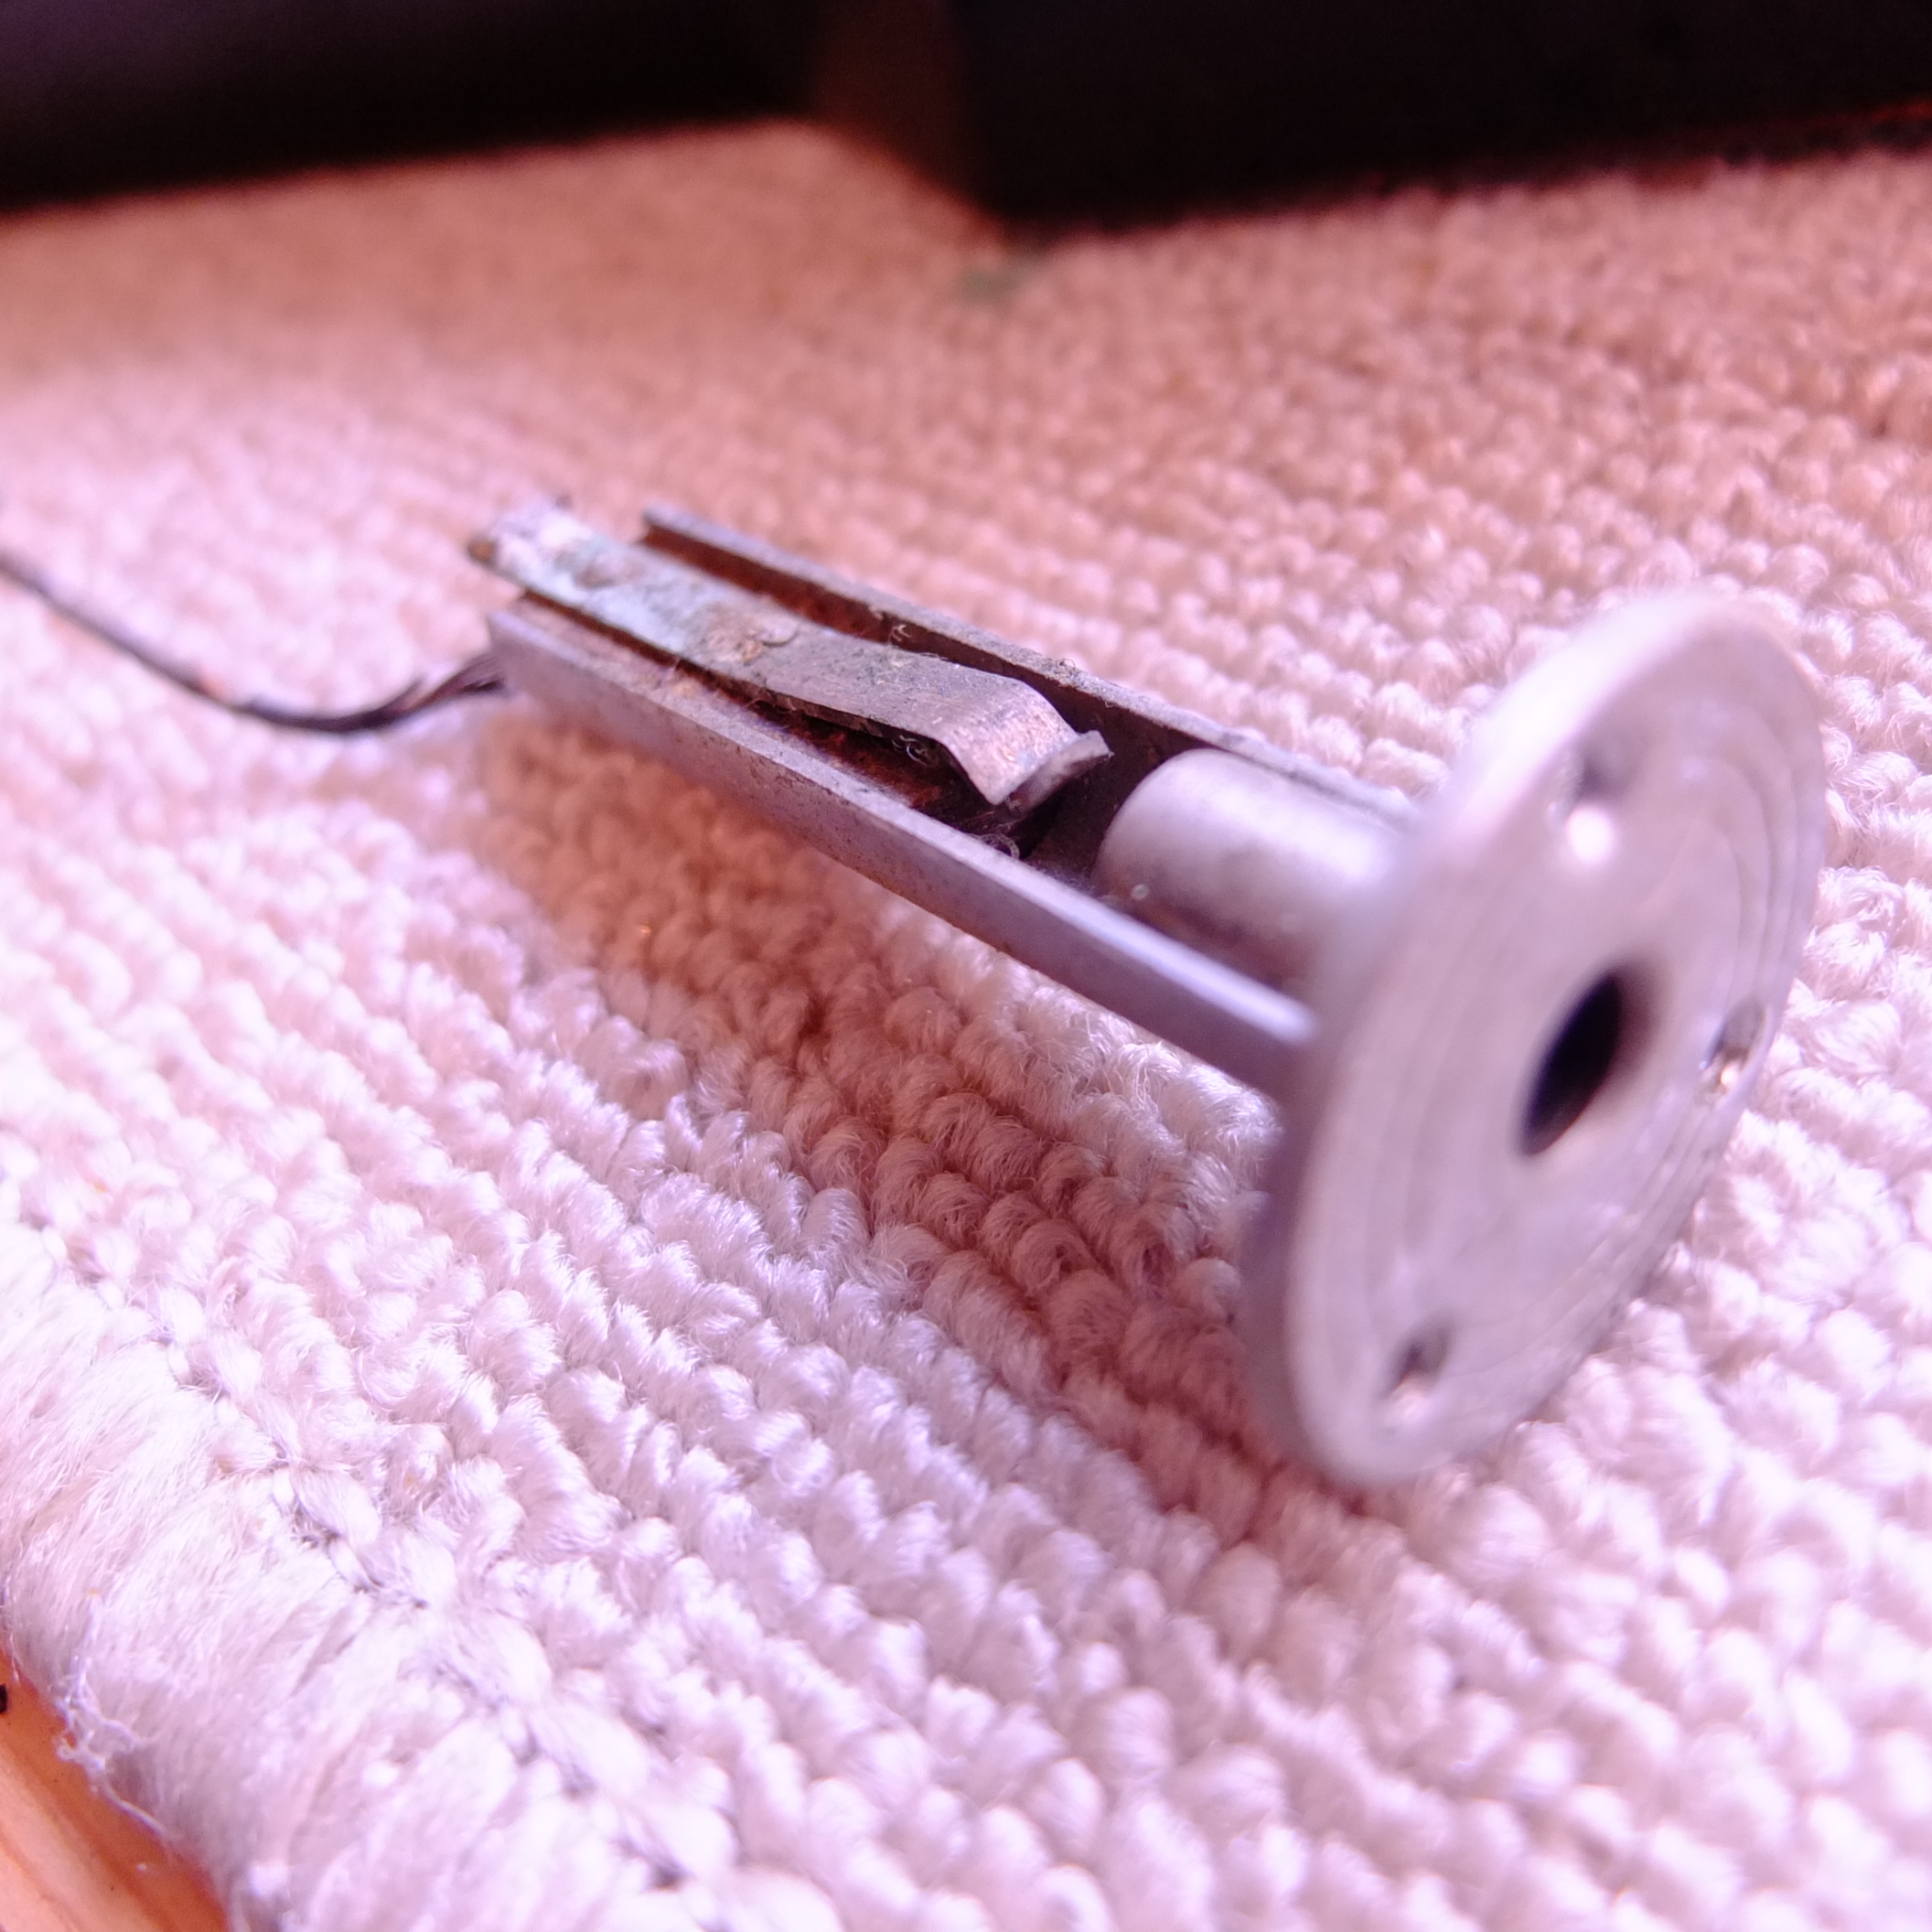
Once it’s cleaned up it’s a little easier to understand, except why is it so long? (Mr. Iwase, who worked in radio repair during the 1940s, and designed and built guitars and amps during the 1950s tipped me off that this design was used on telephone switchboards both pre-war and post-war!) It actually has it’s own route and fits within it’s own cavity underneath the pickup, the wires are attached to the end so they have to have sufficient slack to go into the cavity. The insulator between the positive and negative terminals is a dowel of wood (that’s the positive terminal nailed into the wood there). Ok, back up to the topside:

Yeah. That’s not going to work. But one thing that does work are the original wax paper caps and tone switch:
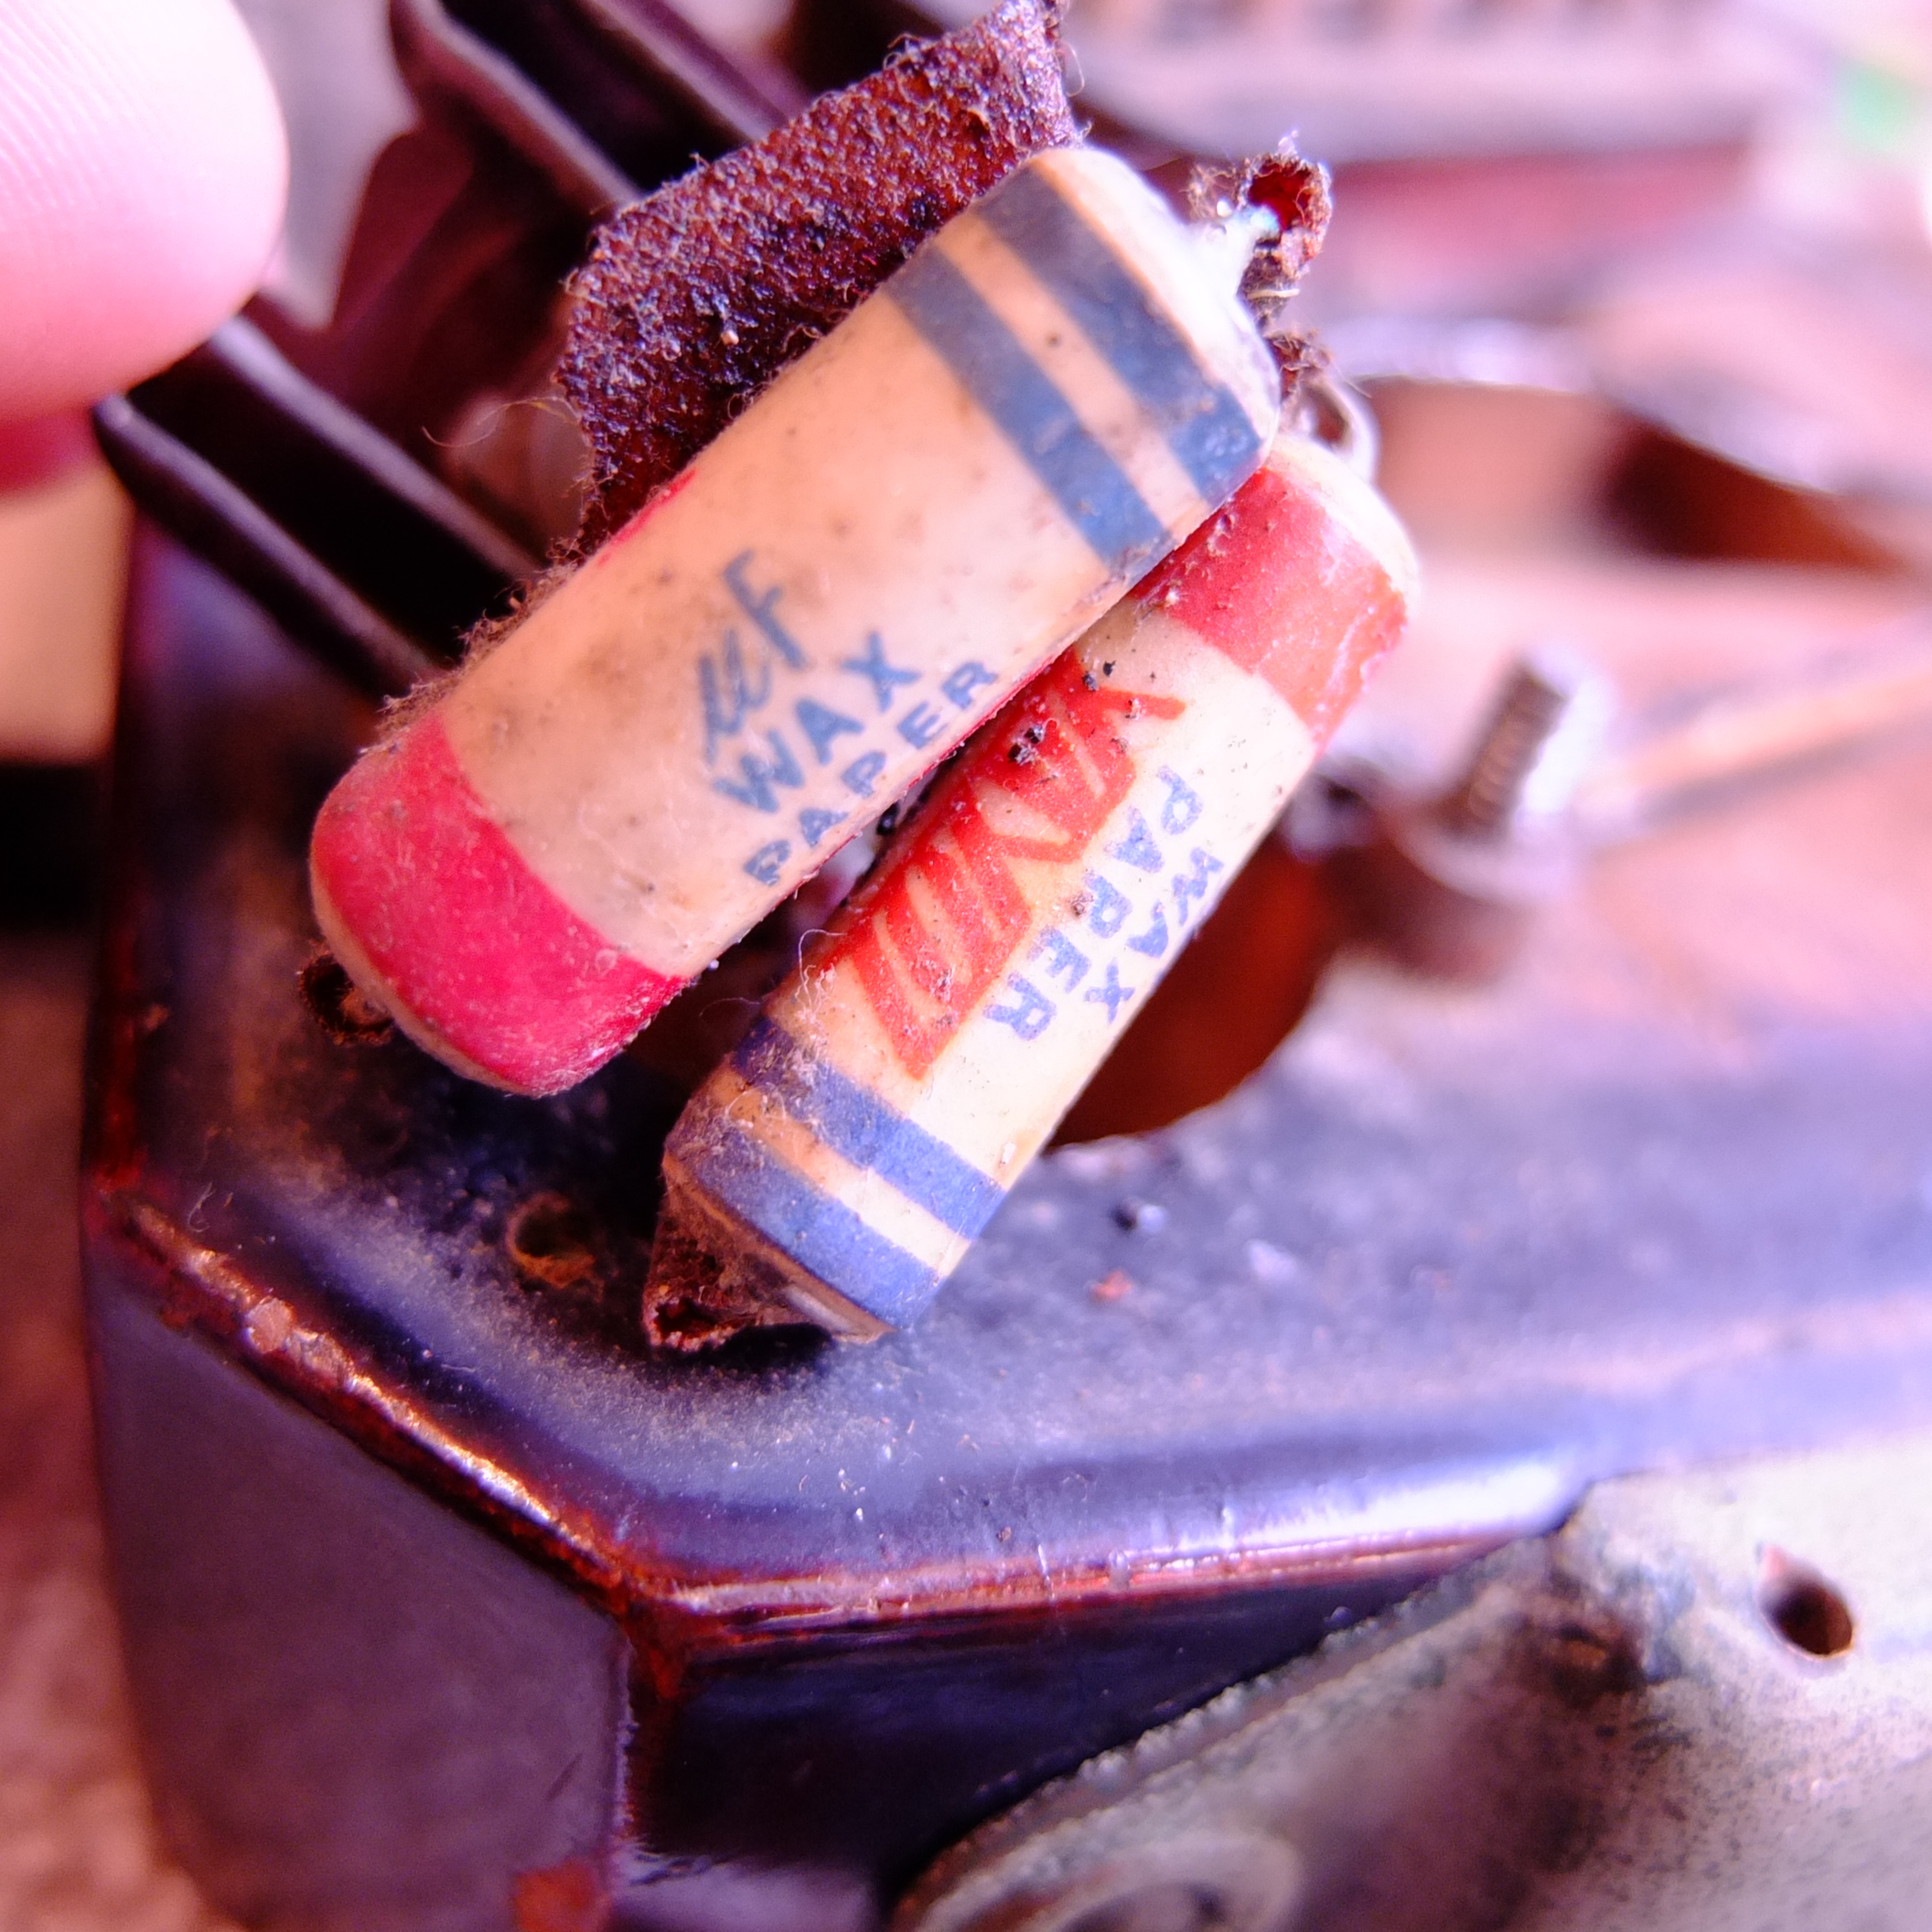

While from the top of the guitar it looks like a tone pot, the knob actually rotates that little square between those two hairpin spring contacts. The square has a contact strip that allows the connection to be made and engage the caps, the non contact side of course takes the caps out of play. Rotating the knob requires a little effort as you can imagine, but it still works, so it can stay. The two caps are .02 and .01 mF – wired together in parallel. I’ve never seen the “Yayoi” capacitor brand before.
After just sitting and looking at things for a while, it becomes pretty apparent how things work, but I make a quick sketch just so that my decrepit mind doesn’t forget.

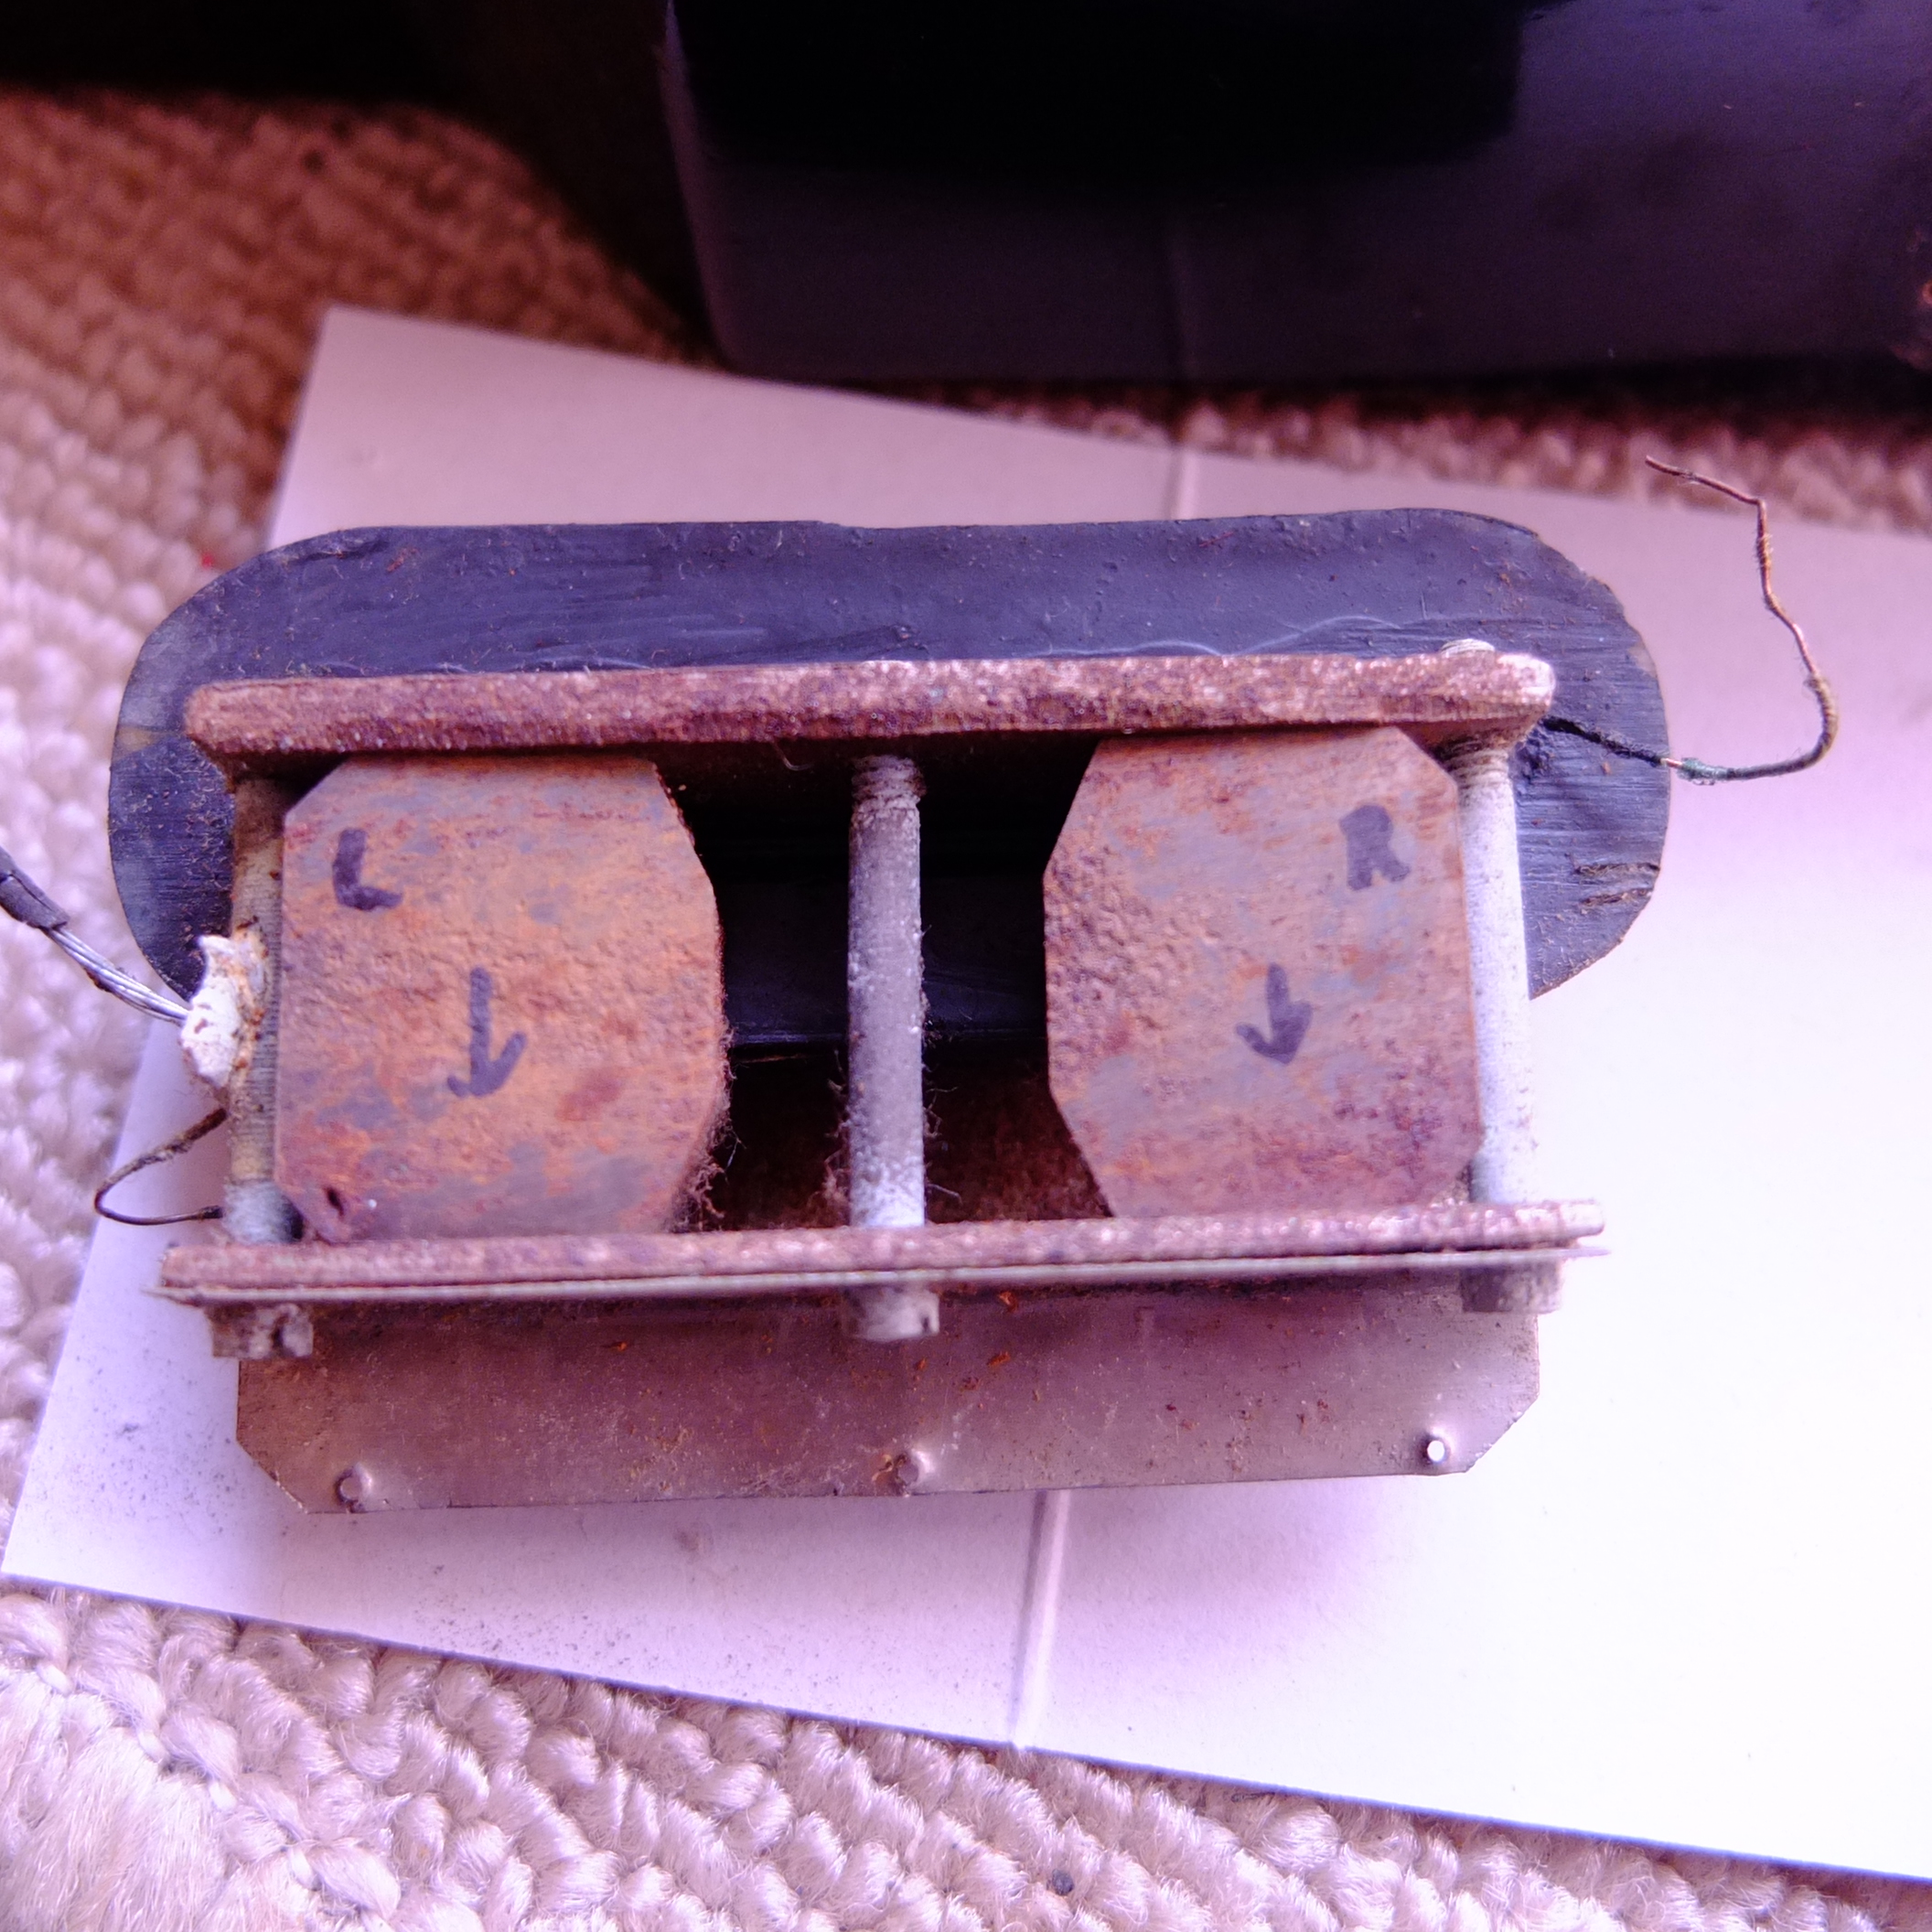
So, the switch works, and surprisingly the volume pot works as well – but the volume pot has some grounding issues which are internal, so it will have to be replaced. However, we come to the real problem:

The leads from the pickup have frayed, and actually once I get into the pickup coil itself, it’s reading as an open circuit, which means it’s dead, dead, dead. So it’s time to rewind it. Because I want to stay as close to the original pickup design as possible I make notes as I disassemble the pickup and weigh and measure the coil so that my rewind ends up with the same result.

Once I’ve done that, I can begin the process of stripping off the old coil.
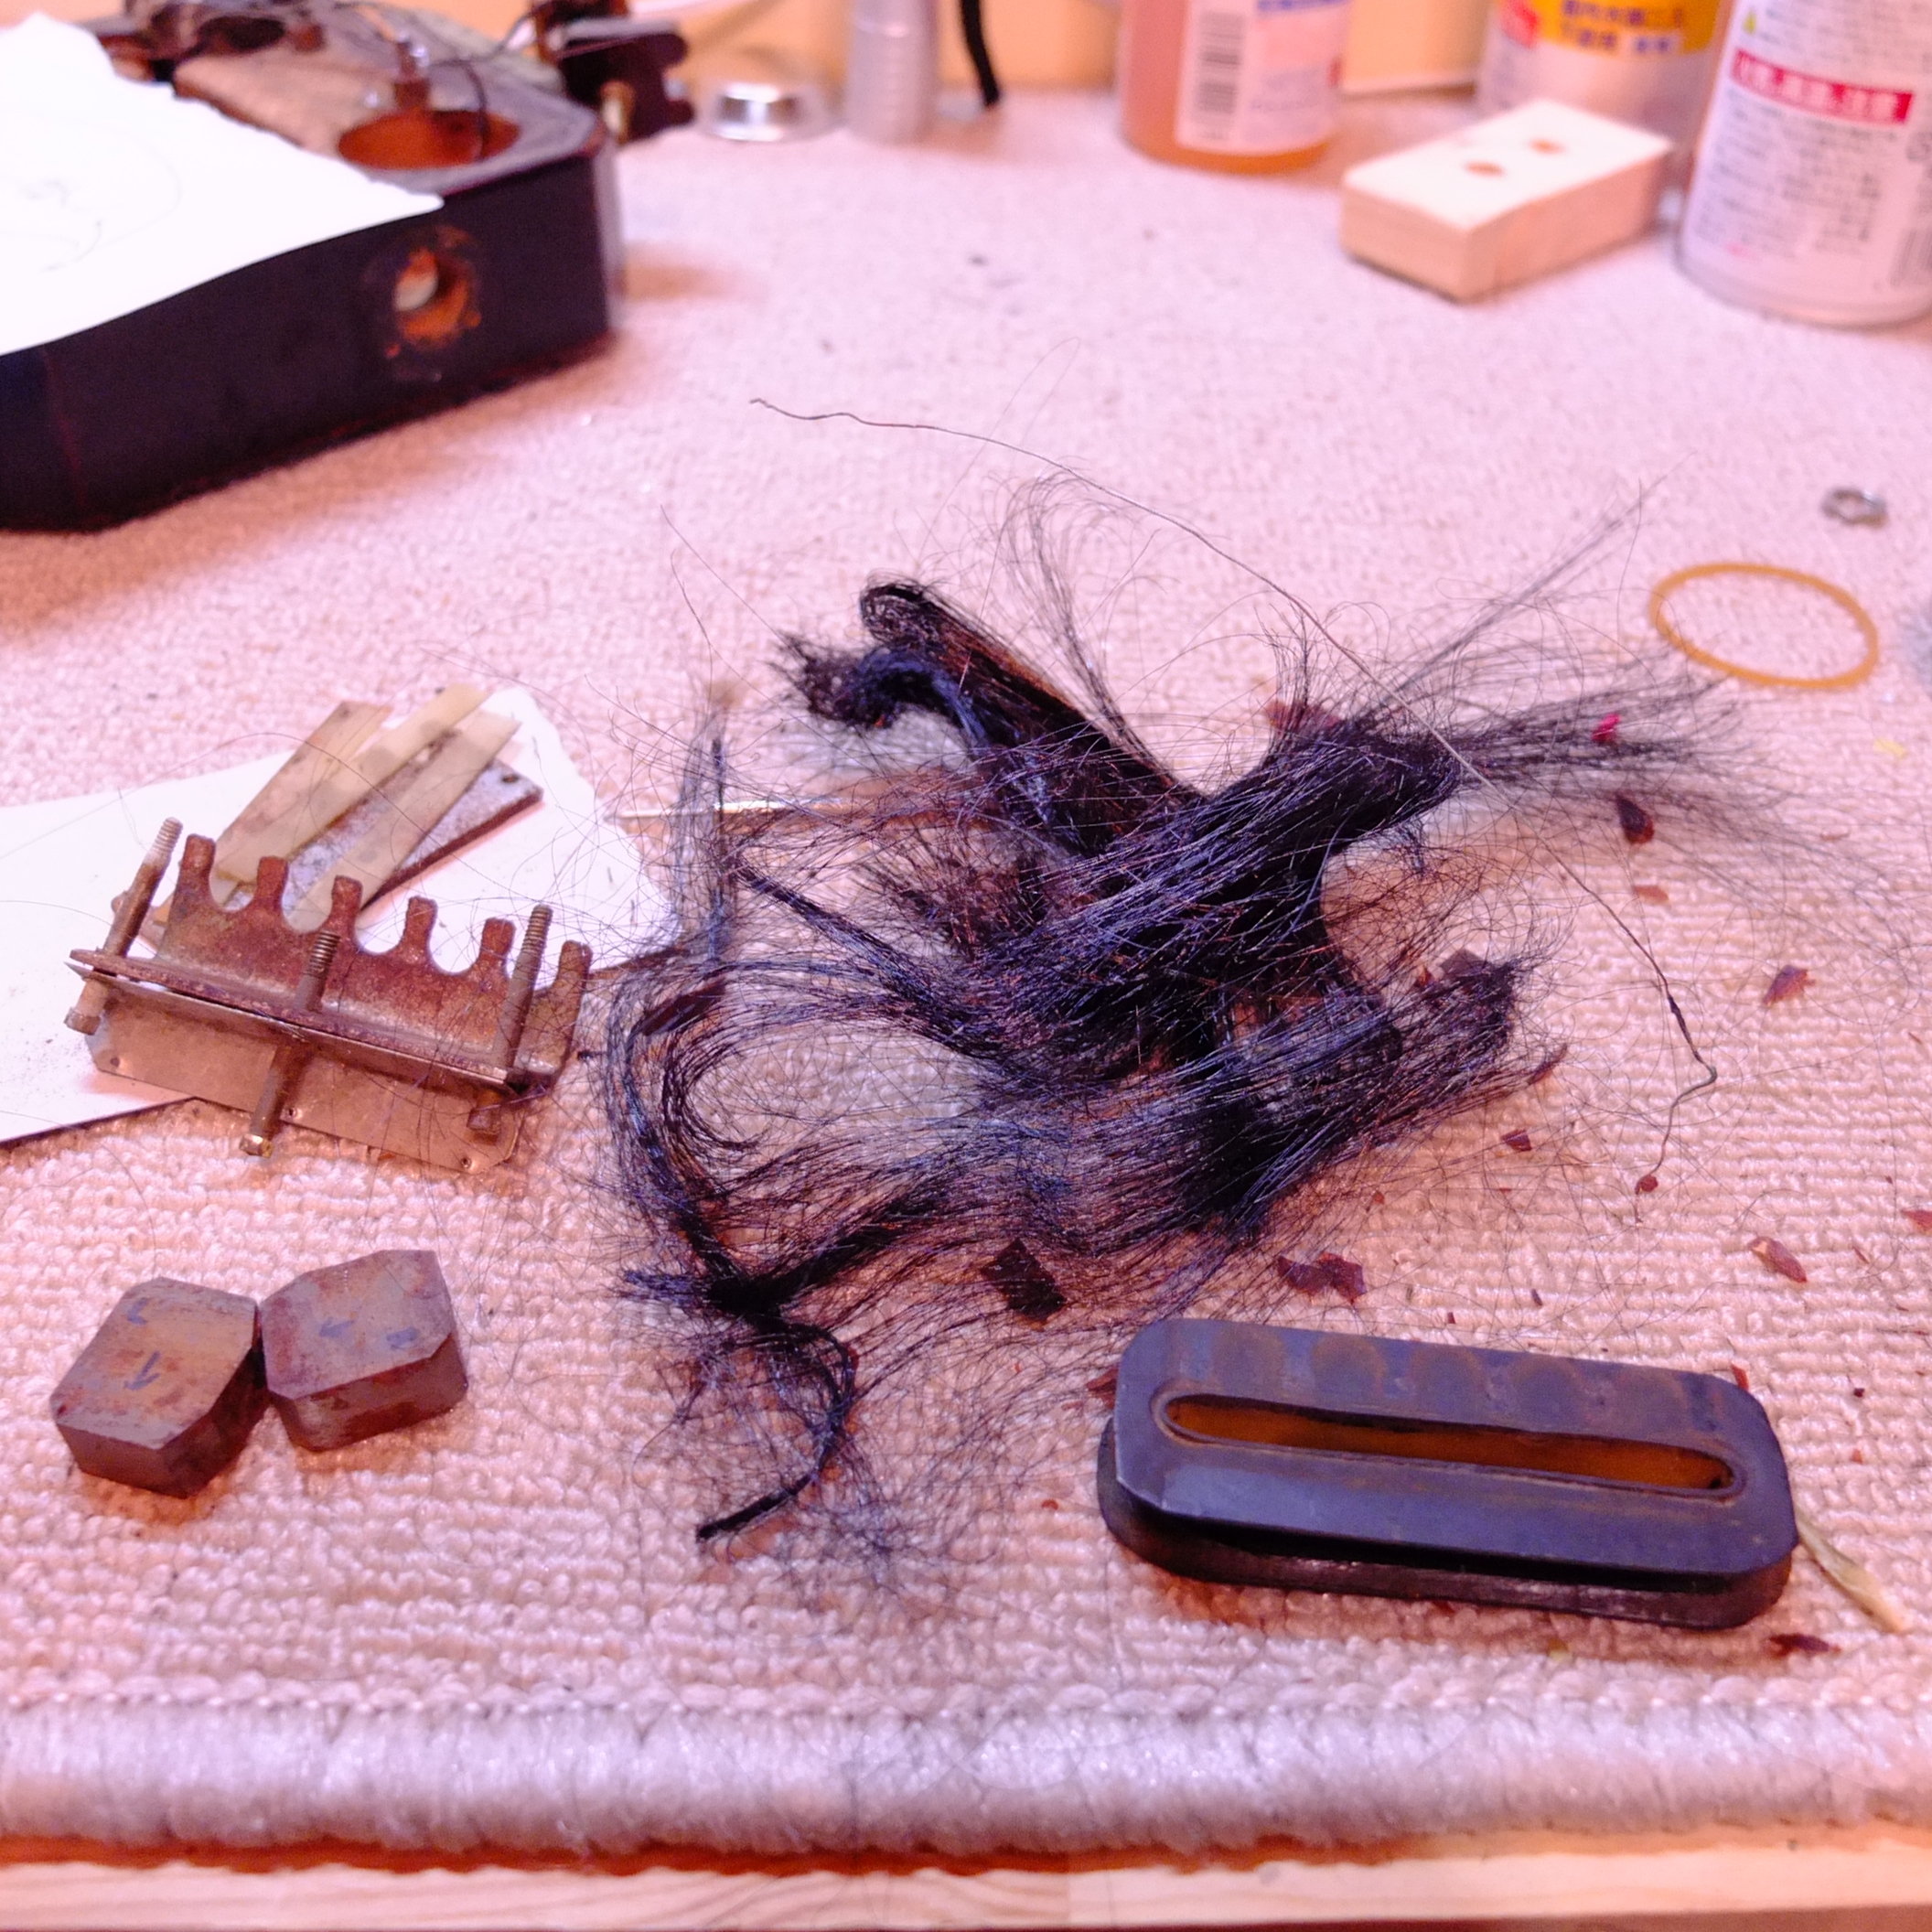
I don’t know what the fear of hair trimmings is called, but if you’ve got that phobia, pickup repair is not for you. When measuring the coil wire (tricky business) I found that it’s 42AWG plain enamel. A lot of the vintage Japanese guitars use this, and so I keep it in stock, though I also have 43AWG, and even 44(!)

I’ve written my measurements on the bottom of the bobbin. The bobbin was also cracked right around the center, so I’ve used some black cyanoacrylate (people love to say this because it just sounds fancier than super glue – like we’re using some obscure chemical that you don’t know about) to repair the bobbin. We’re ready to rewind.
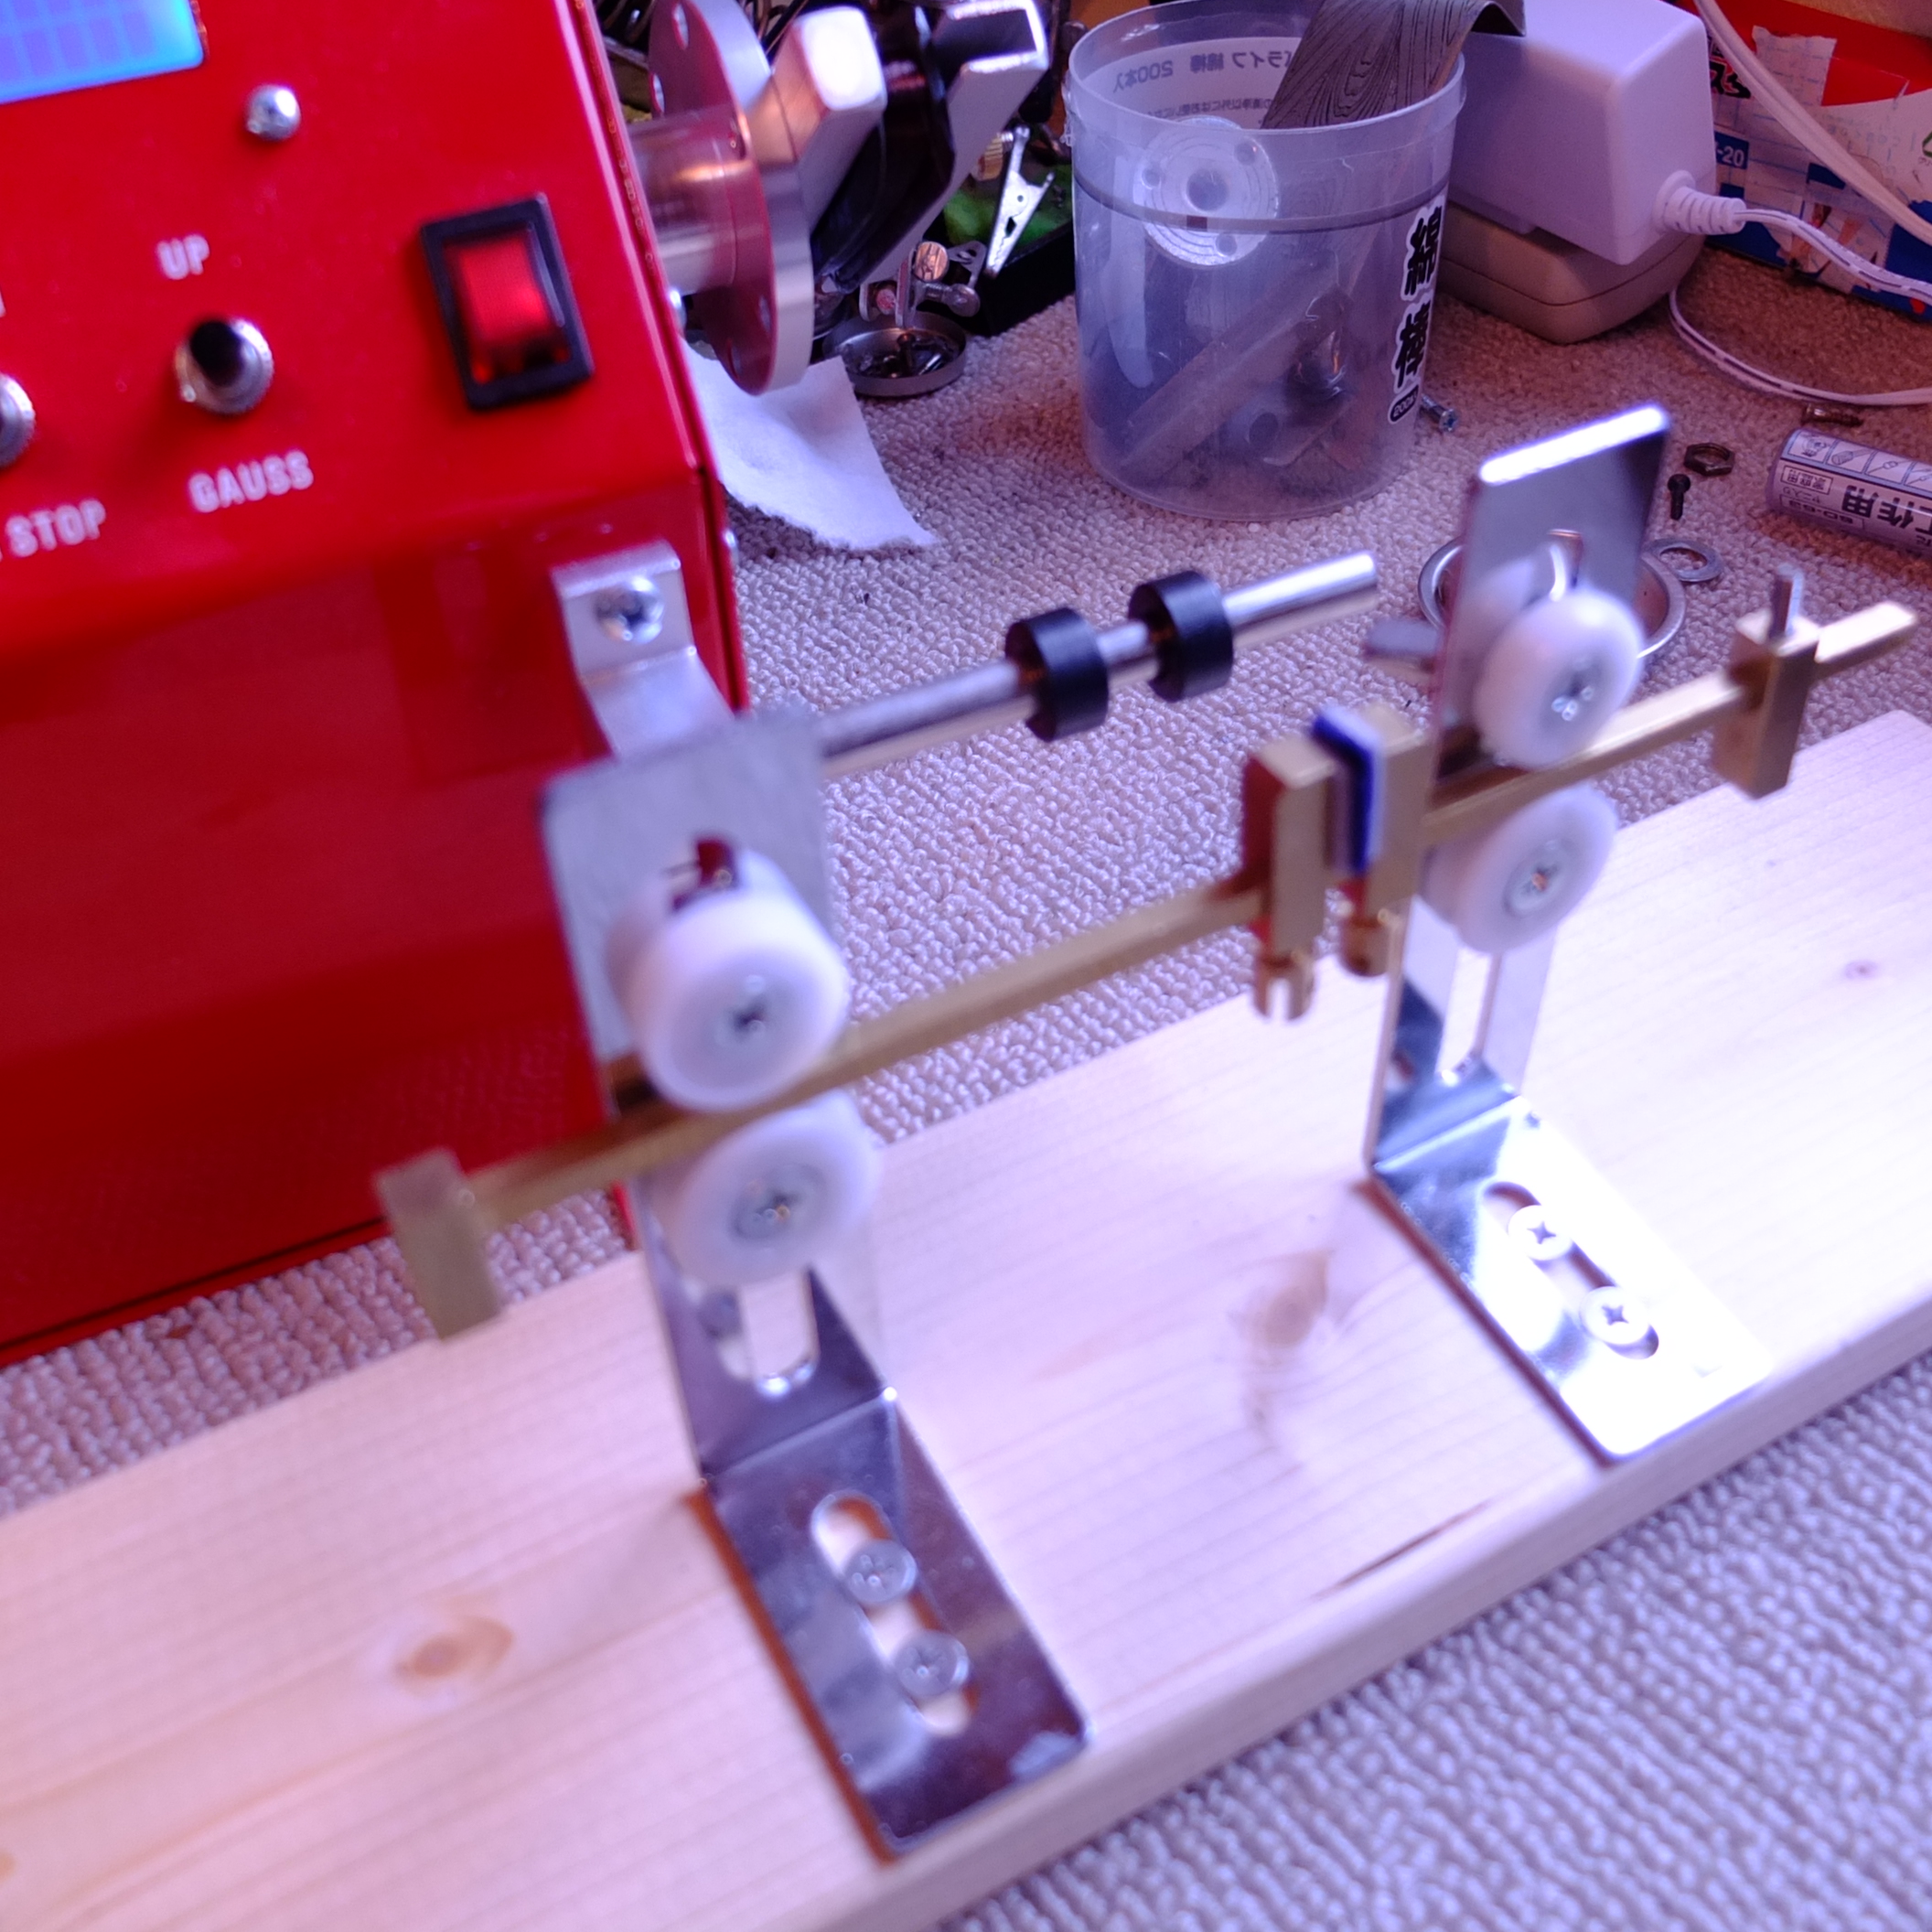
Kind of a poor photo, but I took this to show my winding set up. The thing in front of the pickup winder is a little jig that I built from parts at the hardware store that allows me to maintain tension and move the thread back and forth as I wind, without having to pinch it with my fingers. I can still feel if I have the correct tension by letting the wire run over my finger, but I don’t have to worry about my fingers getting clammy or too dry or my muscles flexing or anything else like that while I wind and I can also move my hand about. Makes the whole process smoother and allows me to wind at great speed without worrying about breaking a wire.

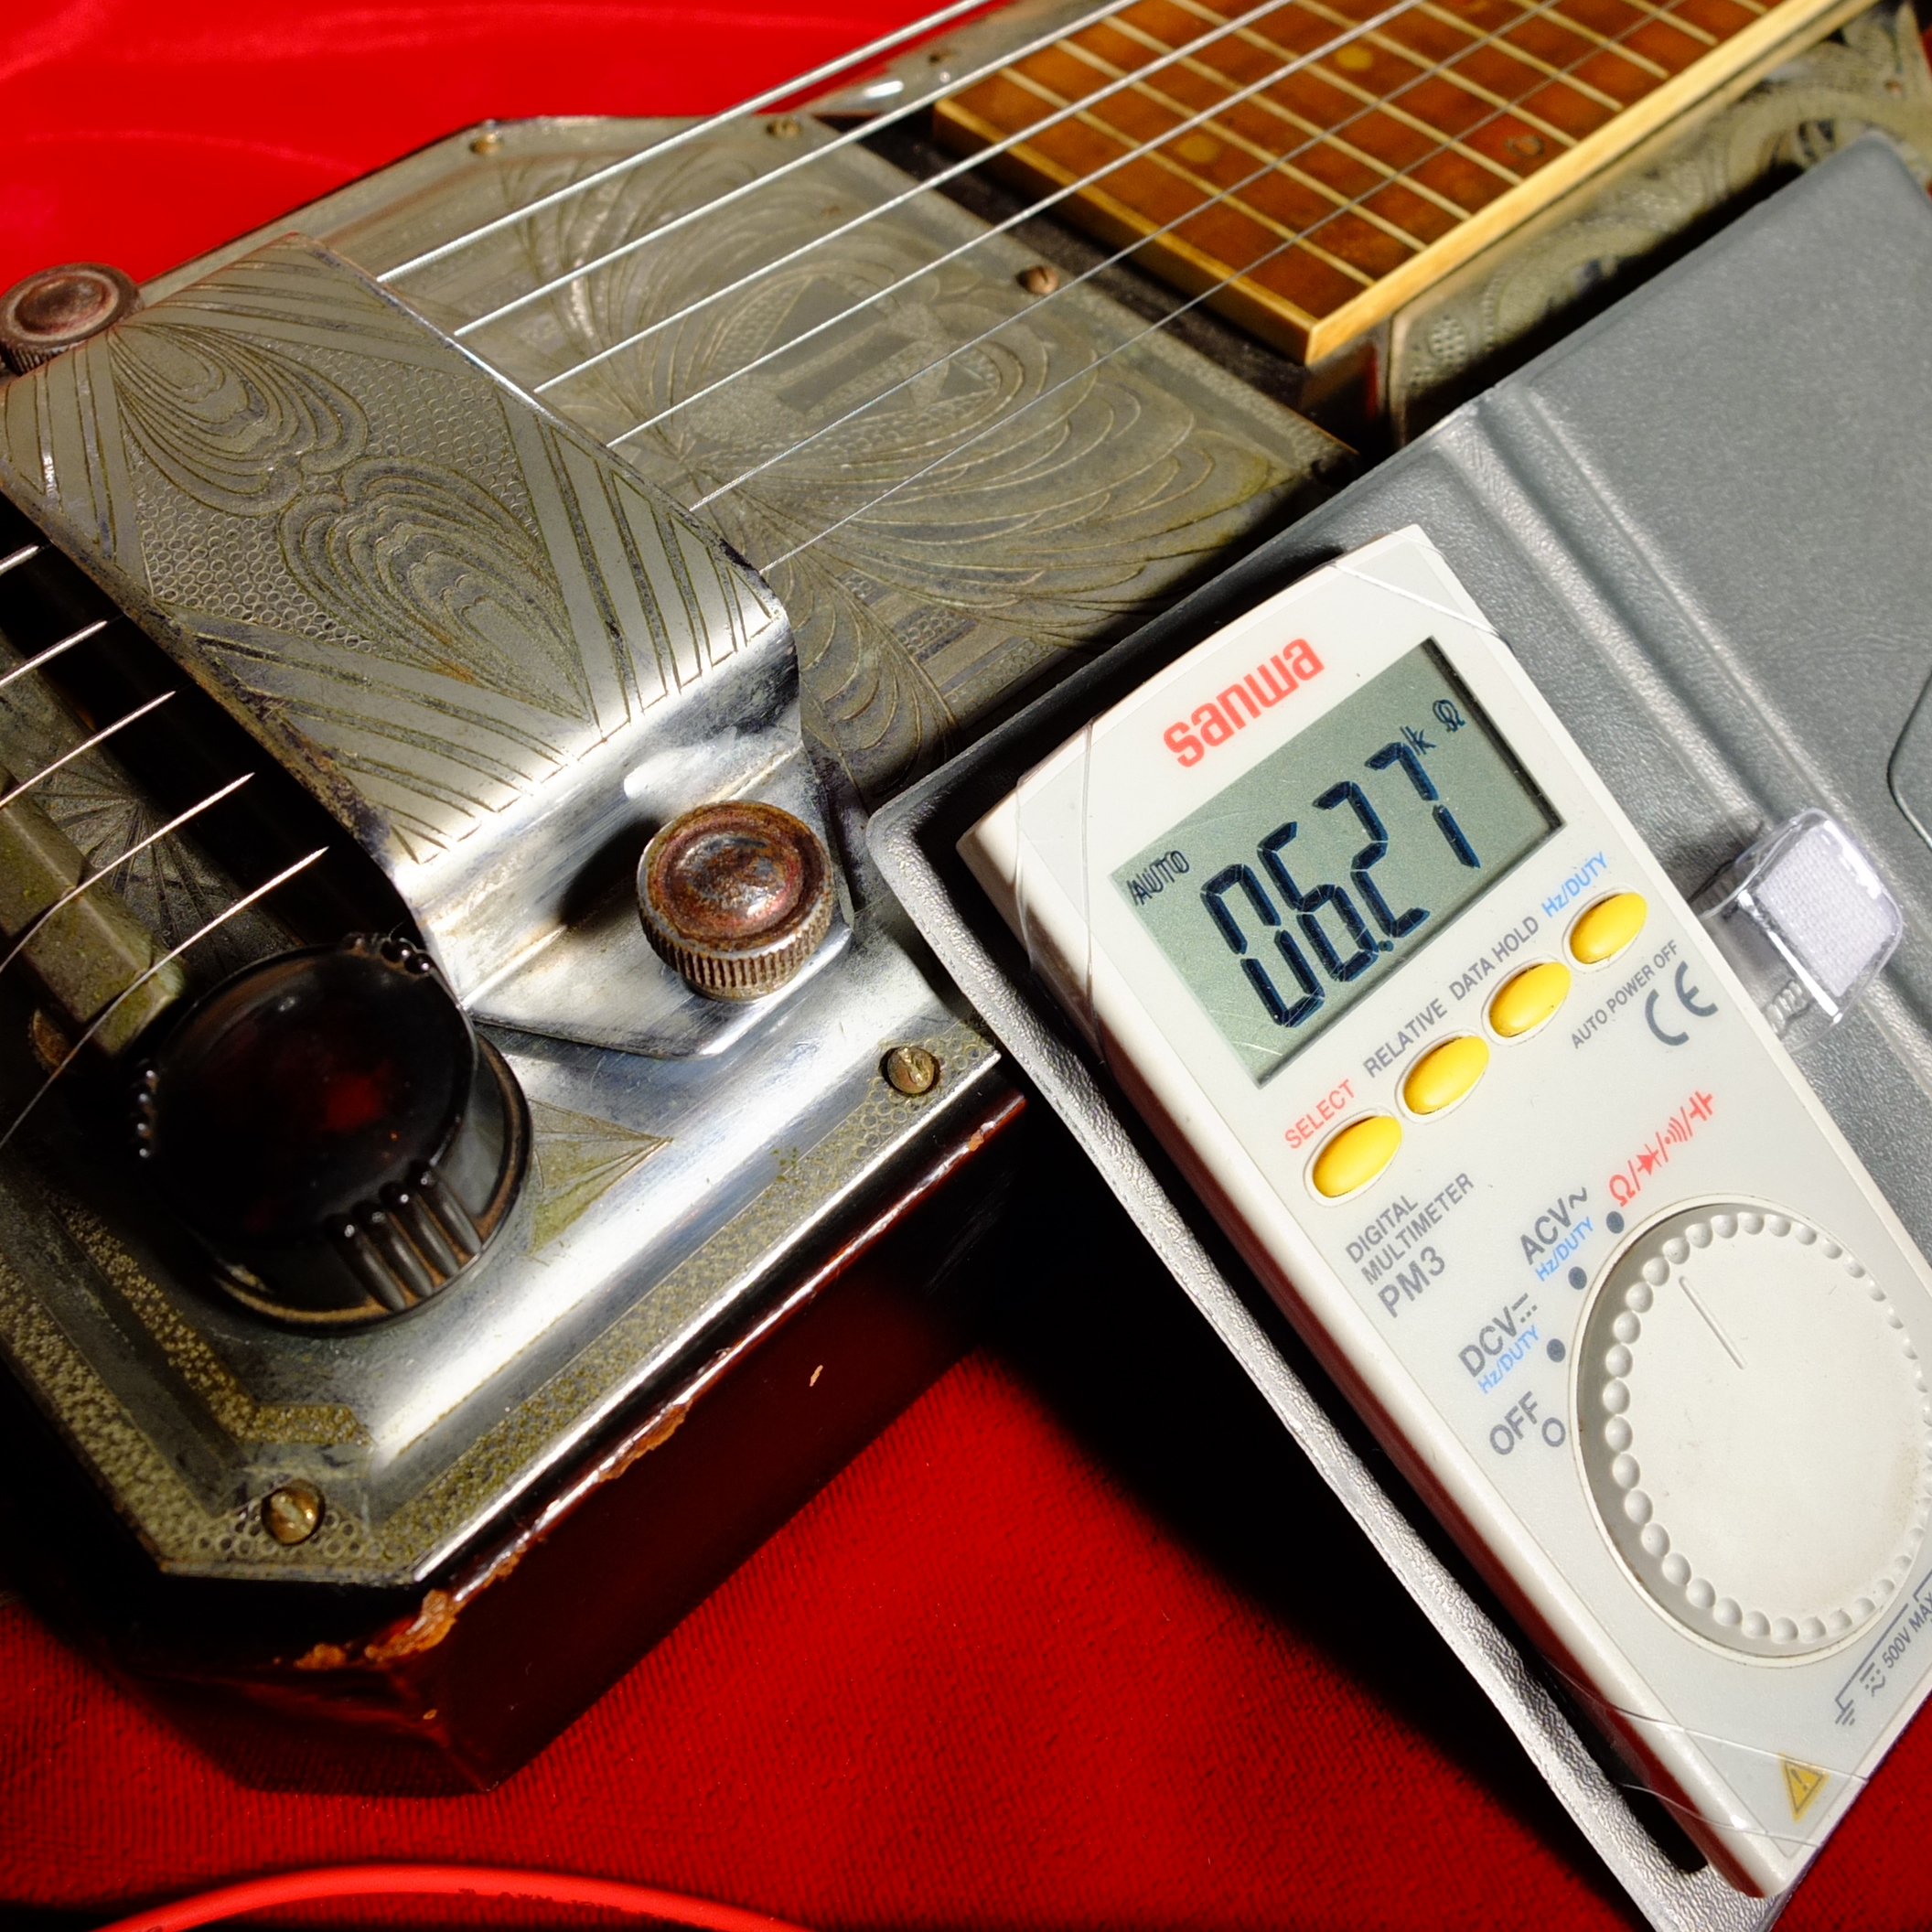
Coil is rewound and we’ve got good output for a vintage lap steel. The weight was close, and the size was right, and this ohm reading is comparable to old Guyatone Lap steels that I’ve worked on, so I’m pretty happy with it. This reading is just a touch hot because I took it right after finishing soldering the lead out from the coil.
New cloth wiring, new volume pot, everything is ready to be put back together. Pickup sounds strong.
The only sad thing about this guitar is that the original tuners couldn’t be saved. They are 3 on a strip tuners, with a 1:16 gear ratio (nice quality for that time) but a very narrow worm gear, and I didn’t have anything that matched. Furthermore I couldn’t even get the posts out if I wanted to without damaging the gear most likely, as they were fastened on with a sort of clip and shim which was then cut off to keep the whole thing from ever coming apart.

(original tuners and original volume pot – the only parts that couldn’t be saved)
To further complicate things, these 3-on-a-plate tuners have a post spacing of 32mm whereas all modern 3-on-a-plate tuners have 35mm post spacings. Fortunately I had a 1950s parlor acoustic that had a slotted headstock and matching spacing. Unfortunately it has plastic buttons which just weren’t as cool. Individual tuners could work, but that’s a decision for the next owner. I’ll also include the original tuners and pot, just for historic value.
Oh, and what about the “Havana” brand? Well, I did some more digging, and eventually on the internet I found another “Havana” branded guitar which had a “Made in Occupied Japan” export medal attaching to it’s case, and inside a “Tanabe Music Manufacturing” stamp. From there I was able to find out that Tanabe Music Manufacturing was a company that was formed in 1897 and mostly produced brass and wind instruments for the military. Post-war Japan experienced a kind of “Hawaiian Music” boom and a lot of companies manufactured lap steels during this time, Tanabe apparently being no exception. They apparently even manufactured a cast aluminum lap steel(!) but examples of the Havana brand are few and far between suggesting their venture into Lap Steel production was short lived. A labor strike in 1955 forced Tanabe Music Manufacturing into bankruptcy and it was then absorbed by Kawai Gakki.
So, that wraps it up for this lap steel. We brought it back to life. We learned a part of Japanese guitar history that we didn’t know before, and can now share with you. We hope to find a new owner for this guitar, but in the meantime, we’ll just enjoy the pictures:


Thanks for reading!
Update 5/16/2016
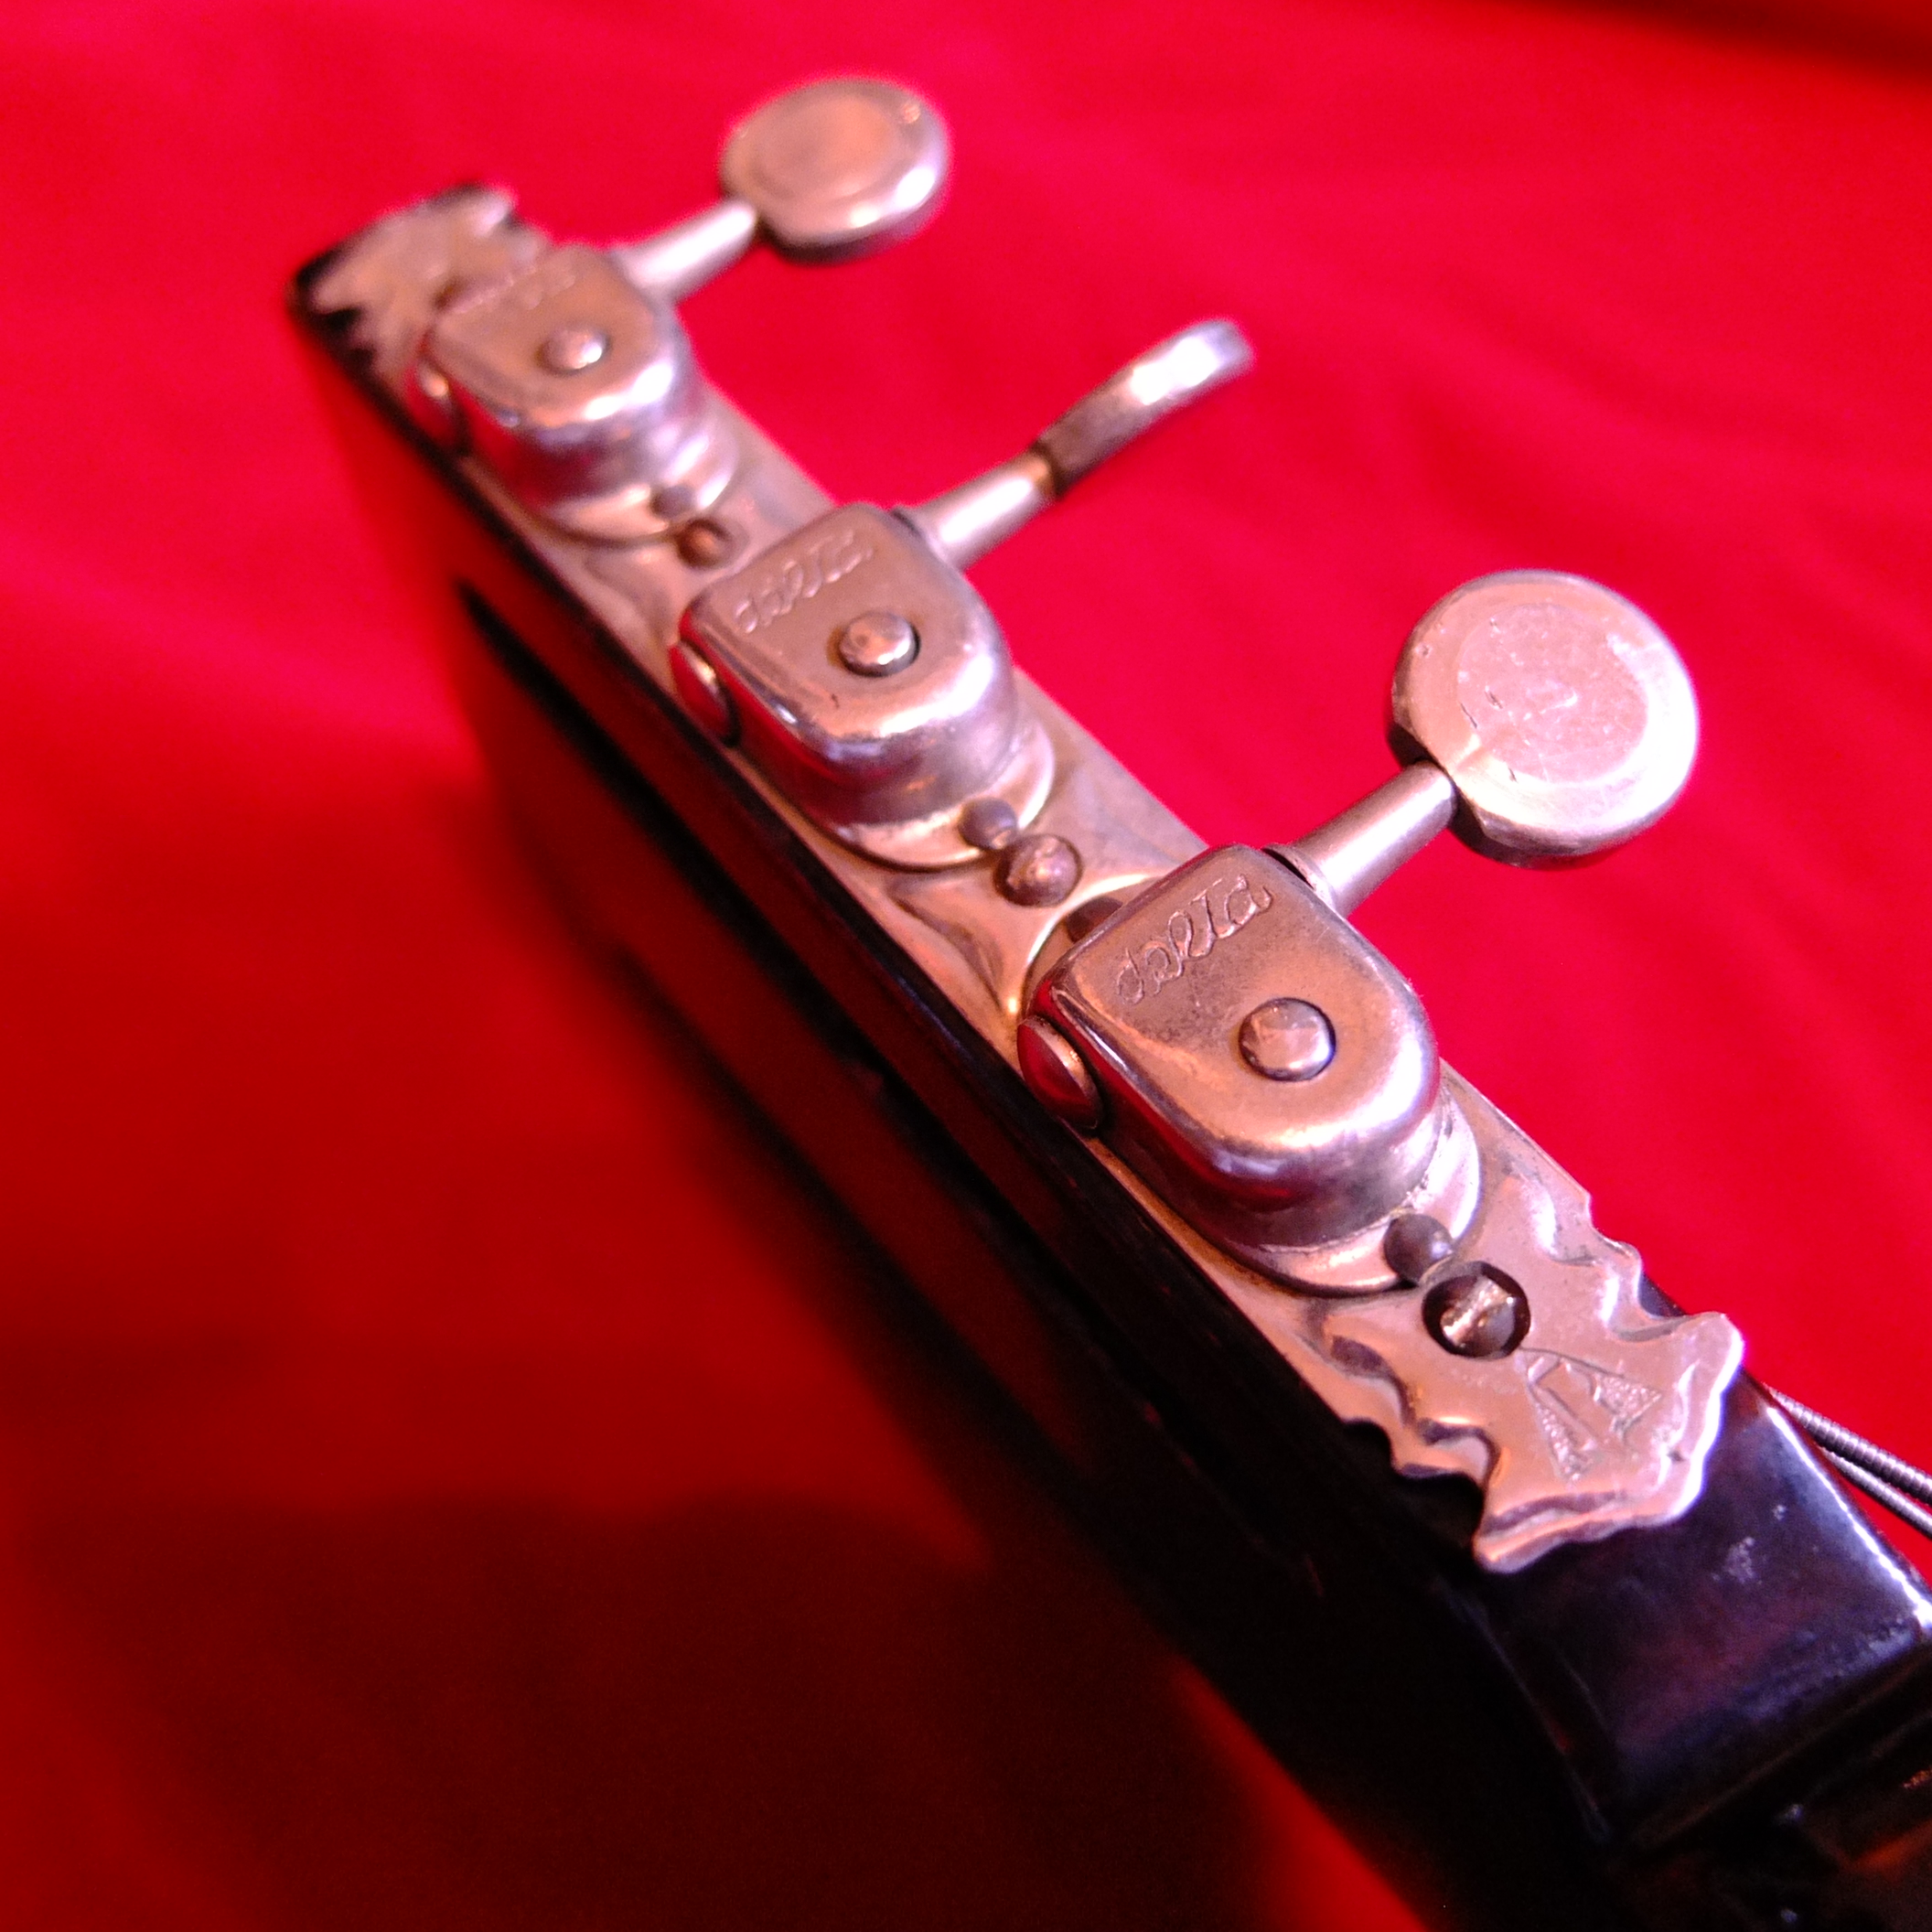
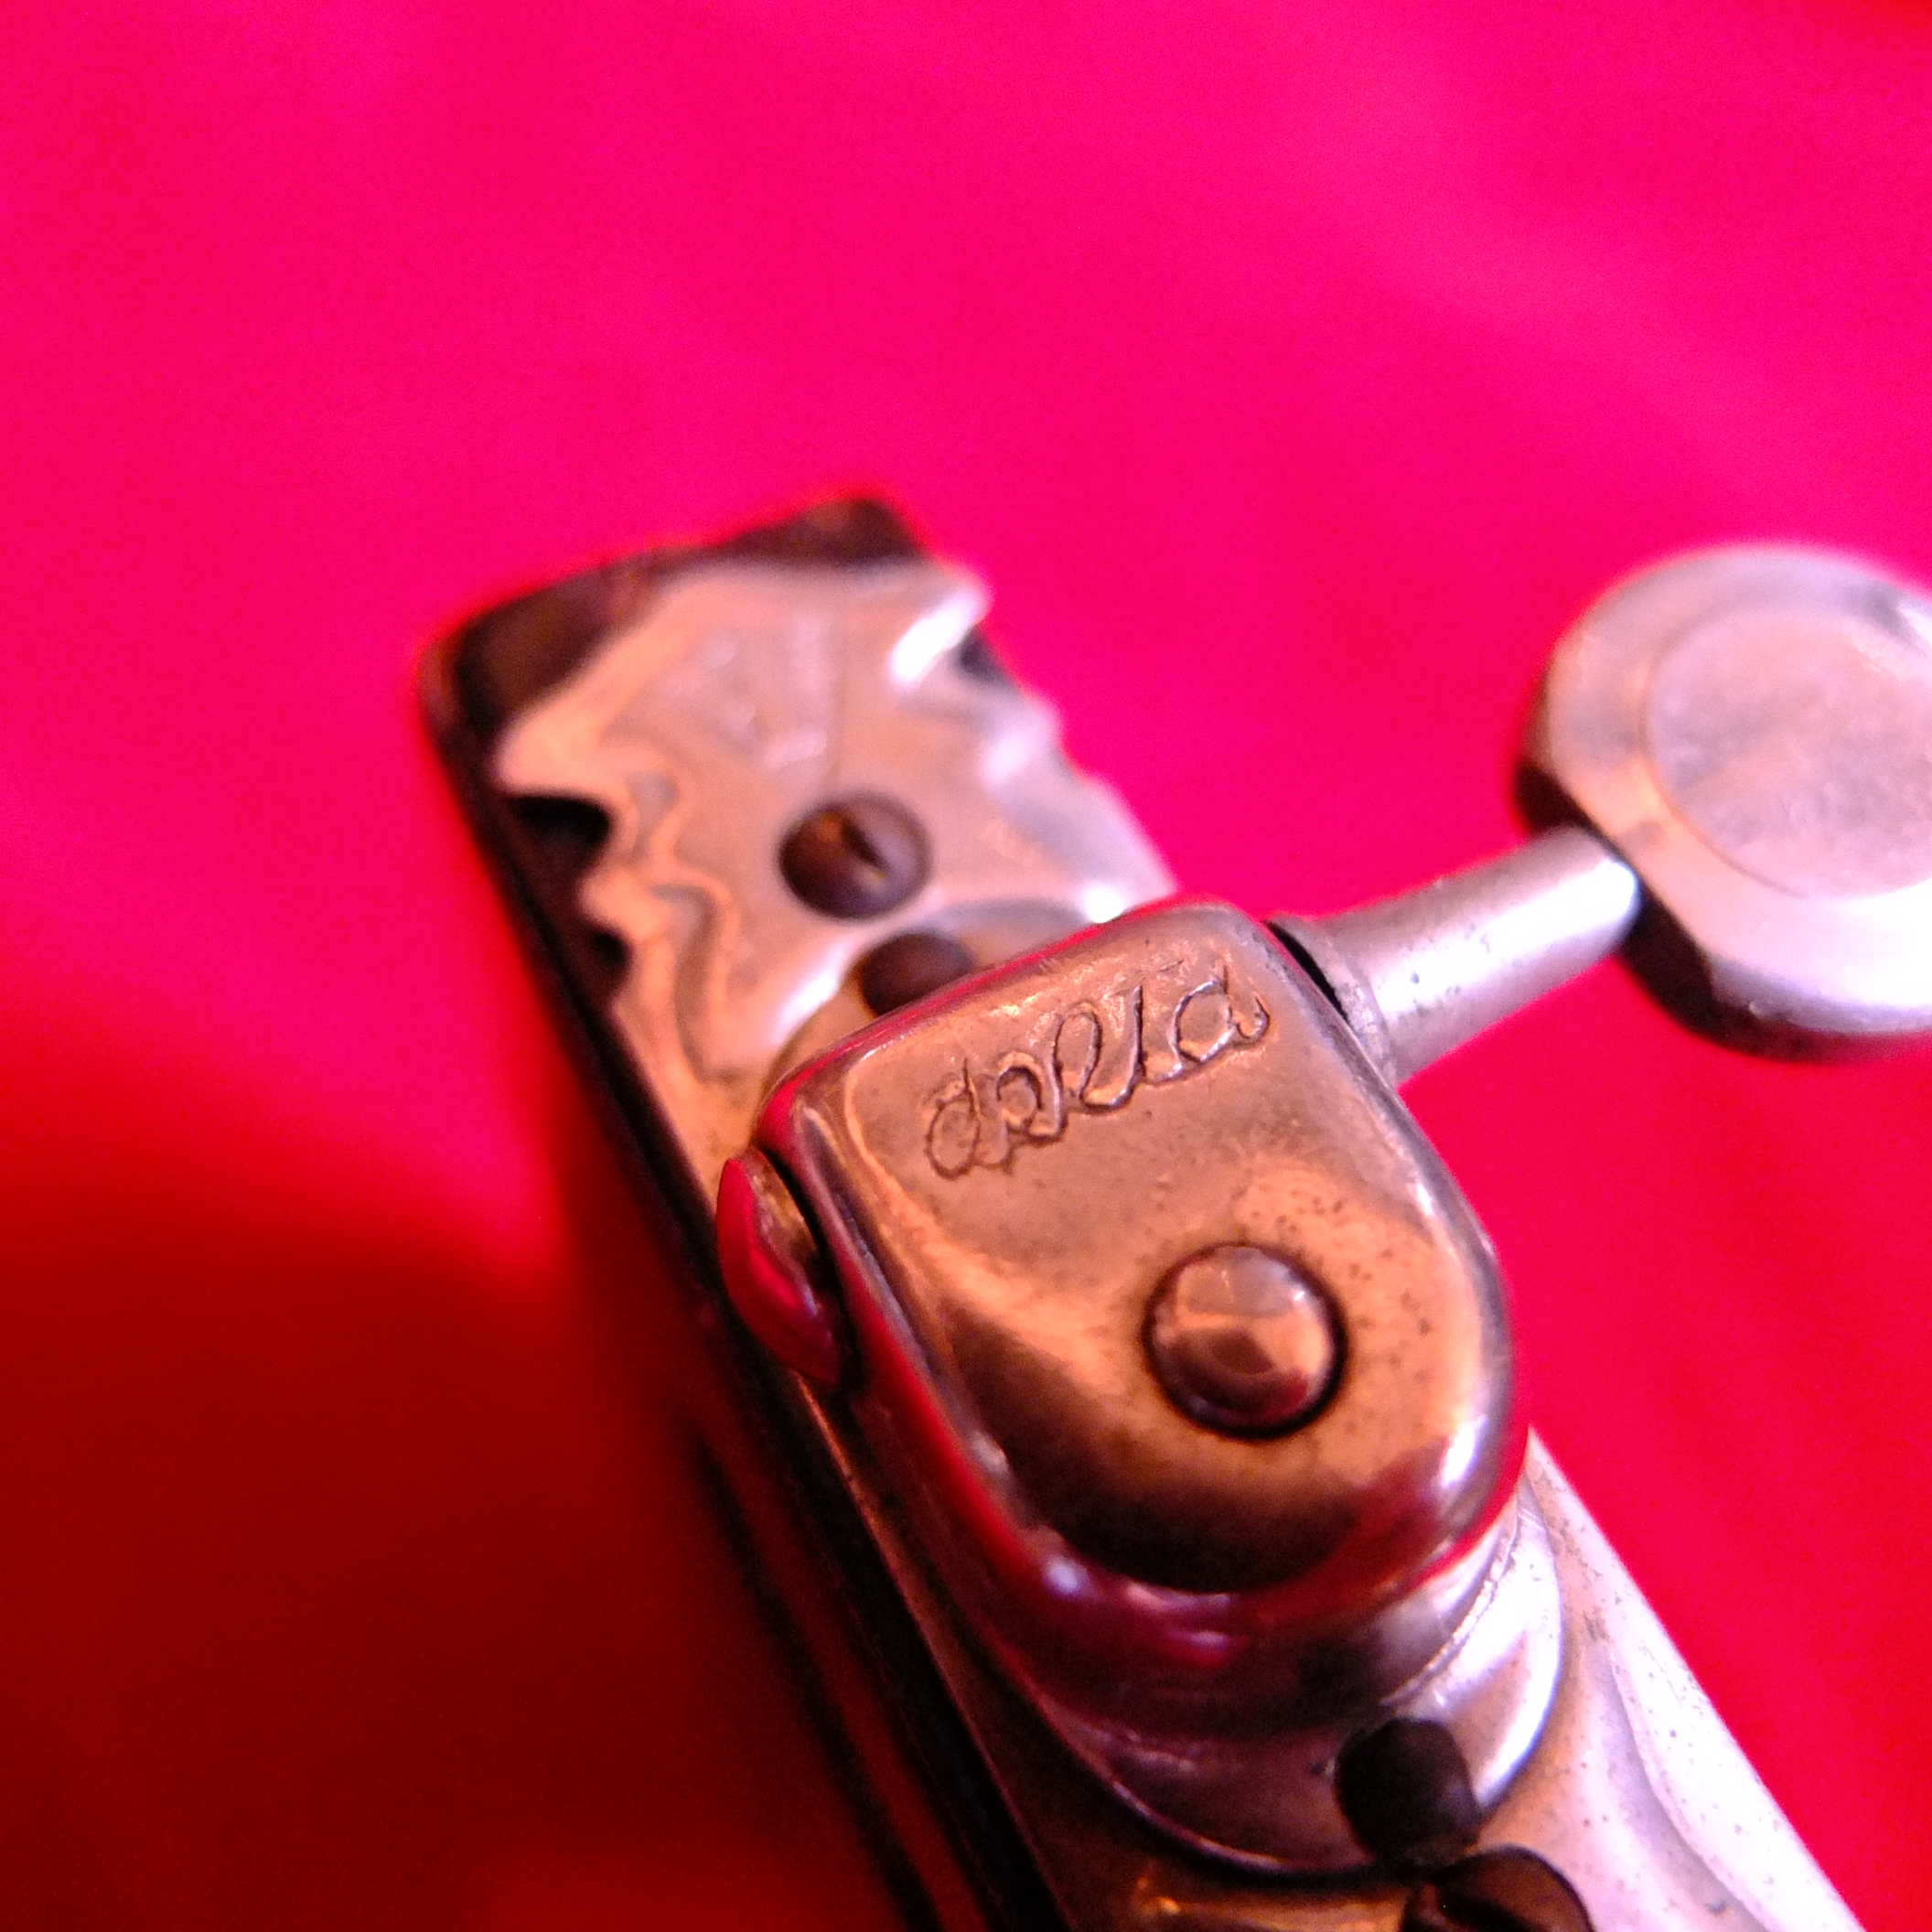
After much hunting around we found another Havana Lap steel, a different model, and it was also missing one side of it’s tuners, but it still had one set with metal buttons remaining. Even though the guitar model is simpler, these tuners appear to be an more deluxe (or newer) version than the one that was on the original lap steel, but they are original. Notice the Havana mark on the tuner plate. The rest of the guitar was in poor condition, so we liberated the set of tuners and put them on the old one, and then moved the plastic button tuners to the donor guitar. Here are some pictures of the tuners, and the donor guitar.

Chaetophobia is fear of hair. Close enough. 😉
Beautiful guitar and thoughtful pictures and restore.